From Ubuntu 14.04 to vaizrdemobox
Virtual box
You can start with the iso file ubuntu-14.04.4-server-amd64.iso which you can find at the following url:
http://releases.ubuntu.com/14.04/ubuntu-14.04.4-server-amd64.iso
Or you can start with virtual box image ubuntu-14.04-server-amd64.ova which you can find at the following url:
https://virtualboxes.org/images/ubuntu-server/
https://s3-eu-west-1.amazonaws.com/virtualboxes.org/ubuntu-14.04-server-amd64.ova.torrent
The two above files are also stored in the vaizrdownload environment in the ubuntu subdirectory
We start here with the .ova file. ubuntu-14.04-server-amd64.ova
Import ubuntu-14.04-server-amd64.ova into Virtual Box
- Select
ubuntu-14.04-server-amd64.ovafor import into Virtual Box - Set the following parameters
* Name : vaizrdemobox
* Description : vaizrdemo / vaizrdemo
* RAM : 4096 MB - Click
Import - Go to settings
==> Network ==> Adapter 1 ==> Port Forwarding
        * Name:ssh      ,Protocol:TCP ,Host Port:2222 ,Guest Port:22
        * Name:Apache   ,Protocol:TCP ,Host Port:8181 ,Guest Port:80
        * Name:Tomcat   ,Protocol:TCP ,Host Port:8080 ,Guest Port:8080
        * Name:NetBeans ,Protocol:TCP ,Host Port:8084 ,Guest Port:8084
==> Ports ==> USB ==> USB 1.1 (OHCI)
Start vaizrdemobox in Virtual Box
- login with:
username :ubuntu
password :reverse -
add user vaizrdemo
ubuntu@ubuntu-amd64:~$ sudo adduser vaizrdemo [sudo] password for ubuntu: perl: warning: Setting locale failed. perl: warning: Please check that your locale settings: LANGUAGE = (unset), LC_ALL = (unset), LC_CTYPE = "UTF-8", LANG = "en_US.UTF-8" are supported and installed on your system. perl: warning: Falling back to the standard locale ("C"). Adding user `vaizrdemo' ... Adding new group `vaizrdemo' (1001) ... Adding new user `vaizrdemo' (1001) with group `vaizrdemo' ... Creating home directory `/home/vaizrdemo' ... Copying files from `/etc/skel' ... Enter new UNIX password: Retype new UNIX password: passwd: password updated successfully Changing the user information for vaizrdemo Enter the new value, or press ENTER for the default Full Name []: Room Number []: Work Phone []: Home Phone []: Other []: Is the information correct? [Y/n] Y ubuntu@ubuntu-amd64:~$ -
add user vaizrdemo to sudo
ubuntu@ubuntu-amd64:~$ sudo usermod -aG sudo vaizrdemo ubuntu@ubuntu-amd64:~$ -
add user vaizrdemo to sudo NOPASSWD
ubuntu@ubuntu-amd64:~$ sudo visudo add the following line at the end of the file and save vaizrdemo ALL=(ALL) NOPASSWD: ALL # # This file MUST be edited with the 'visudo' command as root. # # Please consider adding local content in /etc/sudoers.d/ instead of # directly modifying this file. # # See the man page for details on how to write a sudoers file. # Defaults env_reset Defaults mail_badpass Defaults secure_path="/usr/local/sbin:/usr/local/bin:/usr/sbin:/usr/bin:$ # Host alias specification # User alias specification # Cmnd alias specification # User privilege specification root ALL=(ALL:ALL) ALL # Members of the admin group may gain root privileges %admin ALL=(ALL) ALL # Allow members of group sudo to execute any command %sudo ALL=(ALL:ALL) ALL # See sudoers(5) for more information on "#include" directives: #includedir /etc/sudoers.d vaizrdemo ALL=(ALL) NOPASSWD: ALL -
run as
vaizrdemothelocalinstall_all.shscript on thevaizrdemobox.
This script can be found in thevaizrdemohostscriptsunderinstall.
You can sftp the script to the vaizrdemobox or you can execute it directly with an ssh command.
If you have an ssh prompt you can run the following command:ssh vaizrdemo@localhost -p 2222 < localinstall_all.shNannes-MacBook-Pro:install nosinga$ pwd /Users/nosinga/workspaces/vaizr/vaizrdemodeployment/install Nannes-MacBook-Pro:install nosinga$ ssh vaizrdemo@localhost -p 2222 < localinstall_all.sh Pseudo-terminal will not be allocated because stdin is not a terminal. vaizrdemo@127.0.0.1's password: Welcome to Ubuntu 14.04 LTS (GNU/Linux 3.13.0-24-generic x86_64) * Documentation: https://help.ubuntu.com/ System information as of Tue Jan 31 08:33:07 CET 2017 System load: 0.0 Processes: 68 Usage of /: 6.3% of 17.10GB Users logged in: 1 Memory usage: 1% IP address for eth0: 10.0.2.15 Swap usage: 0% Graph this data and manage this system at: https://landscape.canonical.com/ 0 packages can be updated. 0 updates are security updates. New release '16.04.1 LTS' available. Run 'do-release-upgrade' to upgrade to it. Get:1 http://security.ubuntu.com trusty-security InRelease [65.9 kB] Get:2 http://security.ubuntu.com trusty-security/main Sources [124 kB] Ign http://us.archive.ubuntu.com trusty InRelease ... ... ... 27- 274177042163006/source", "state": "file", "uid": 1001} PLAY RECAP ****************************************************************** 127.0.0.1 : ok=60 changed=54 unreachable=0 failed=0 Nannes-MacBook-Pro:install nosinga$
At this point we have created the start situation for Getting Started
- Export
vaizrdemobox- stop the
vaizrdemoboxby turning the power off in Virtual Box (right mouse button) - export the appliance
vaizrdemobox
- stop the
Amazon Web Services (AWS), Elastic Cloud 2 (EC2)
You can also host your vaizrdemobox at AWS.
-
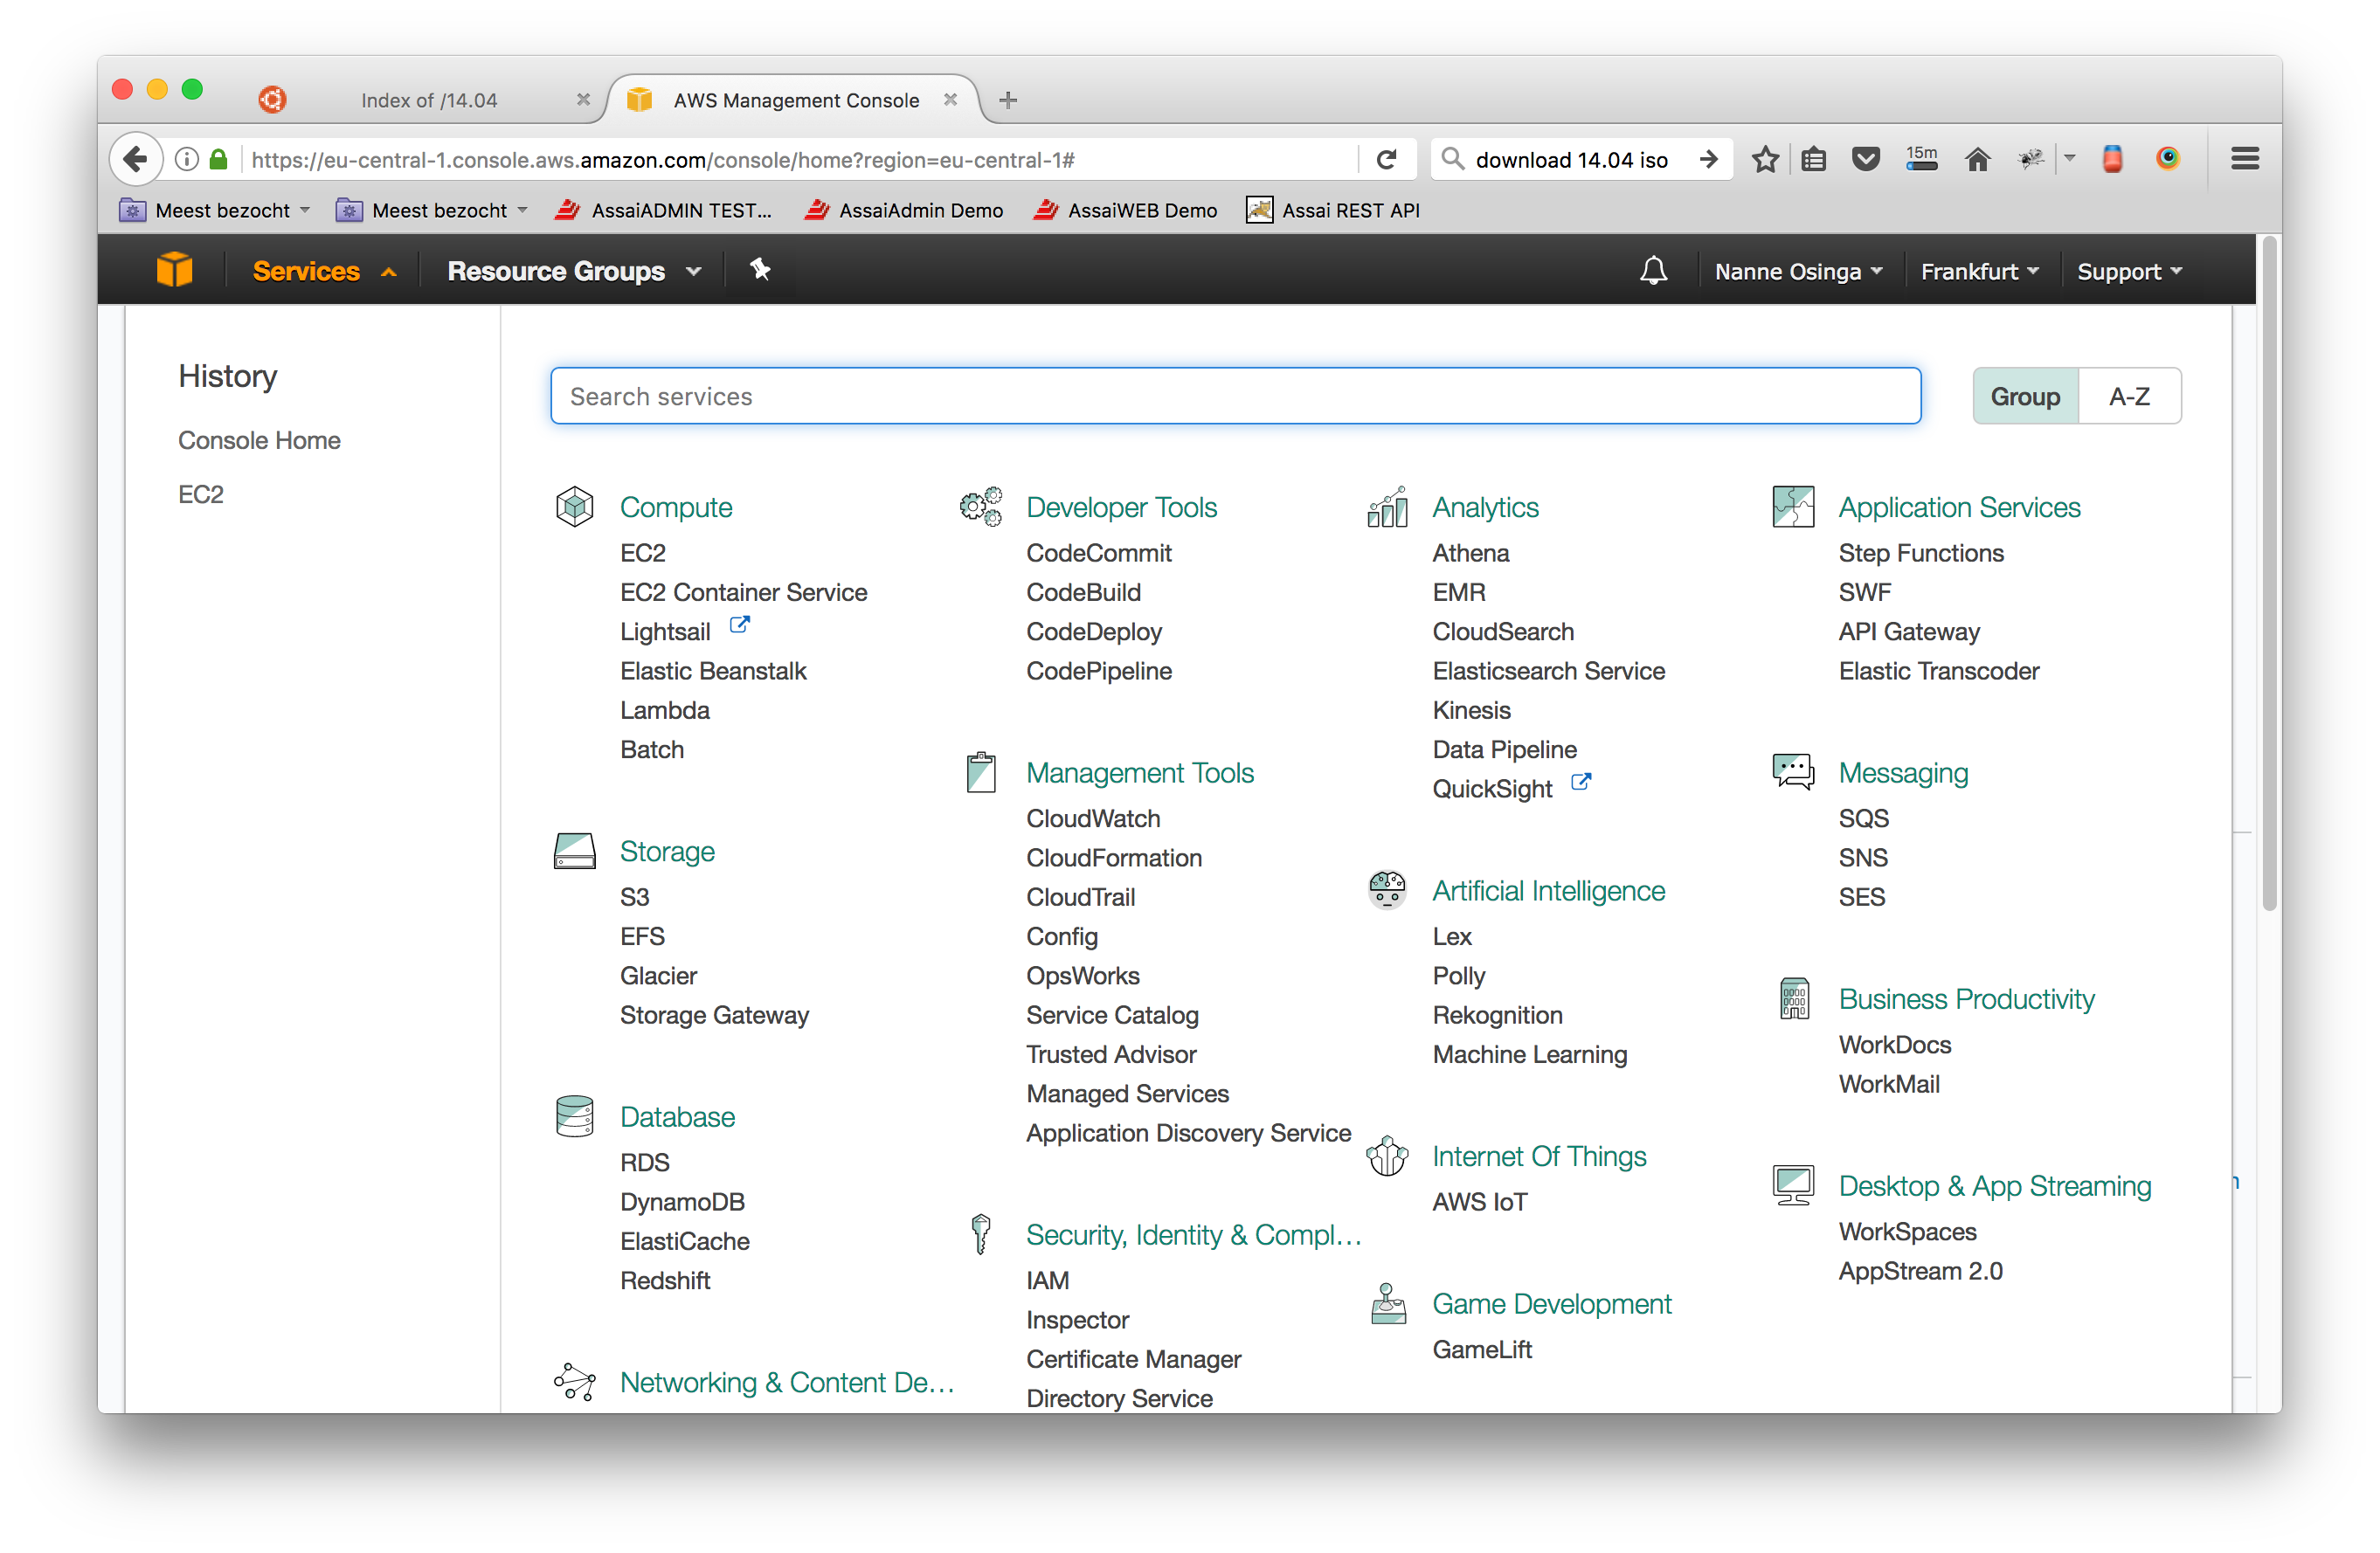
After you have created a user account at AWS you can login and you will see the following screen
-
Go to EC2 and click
Launch Instance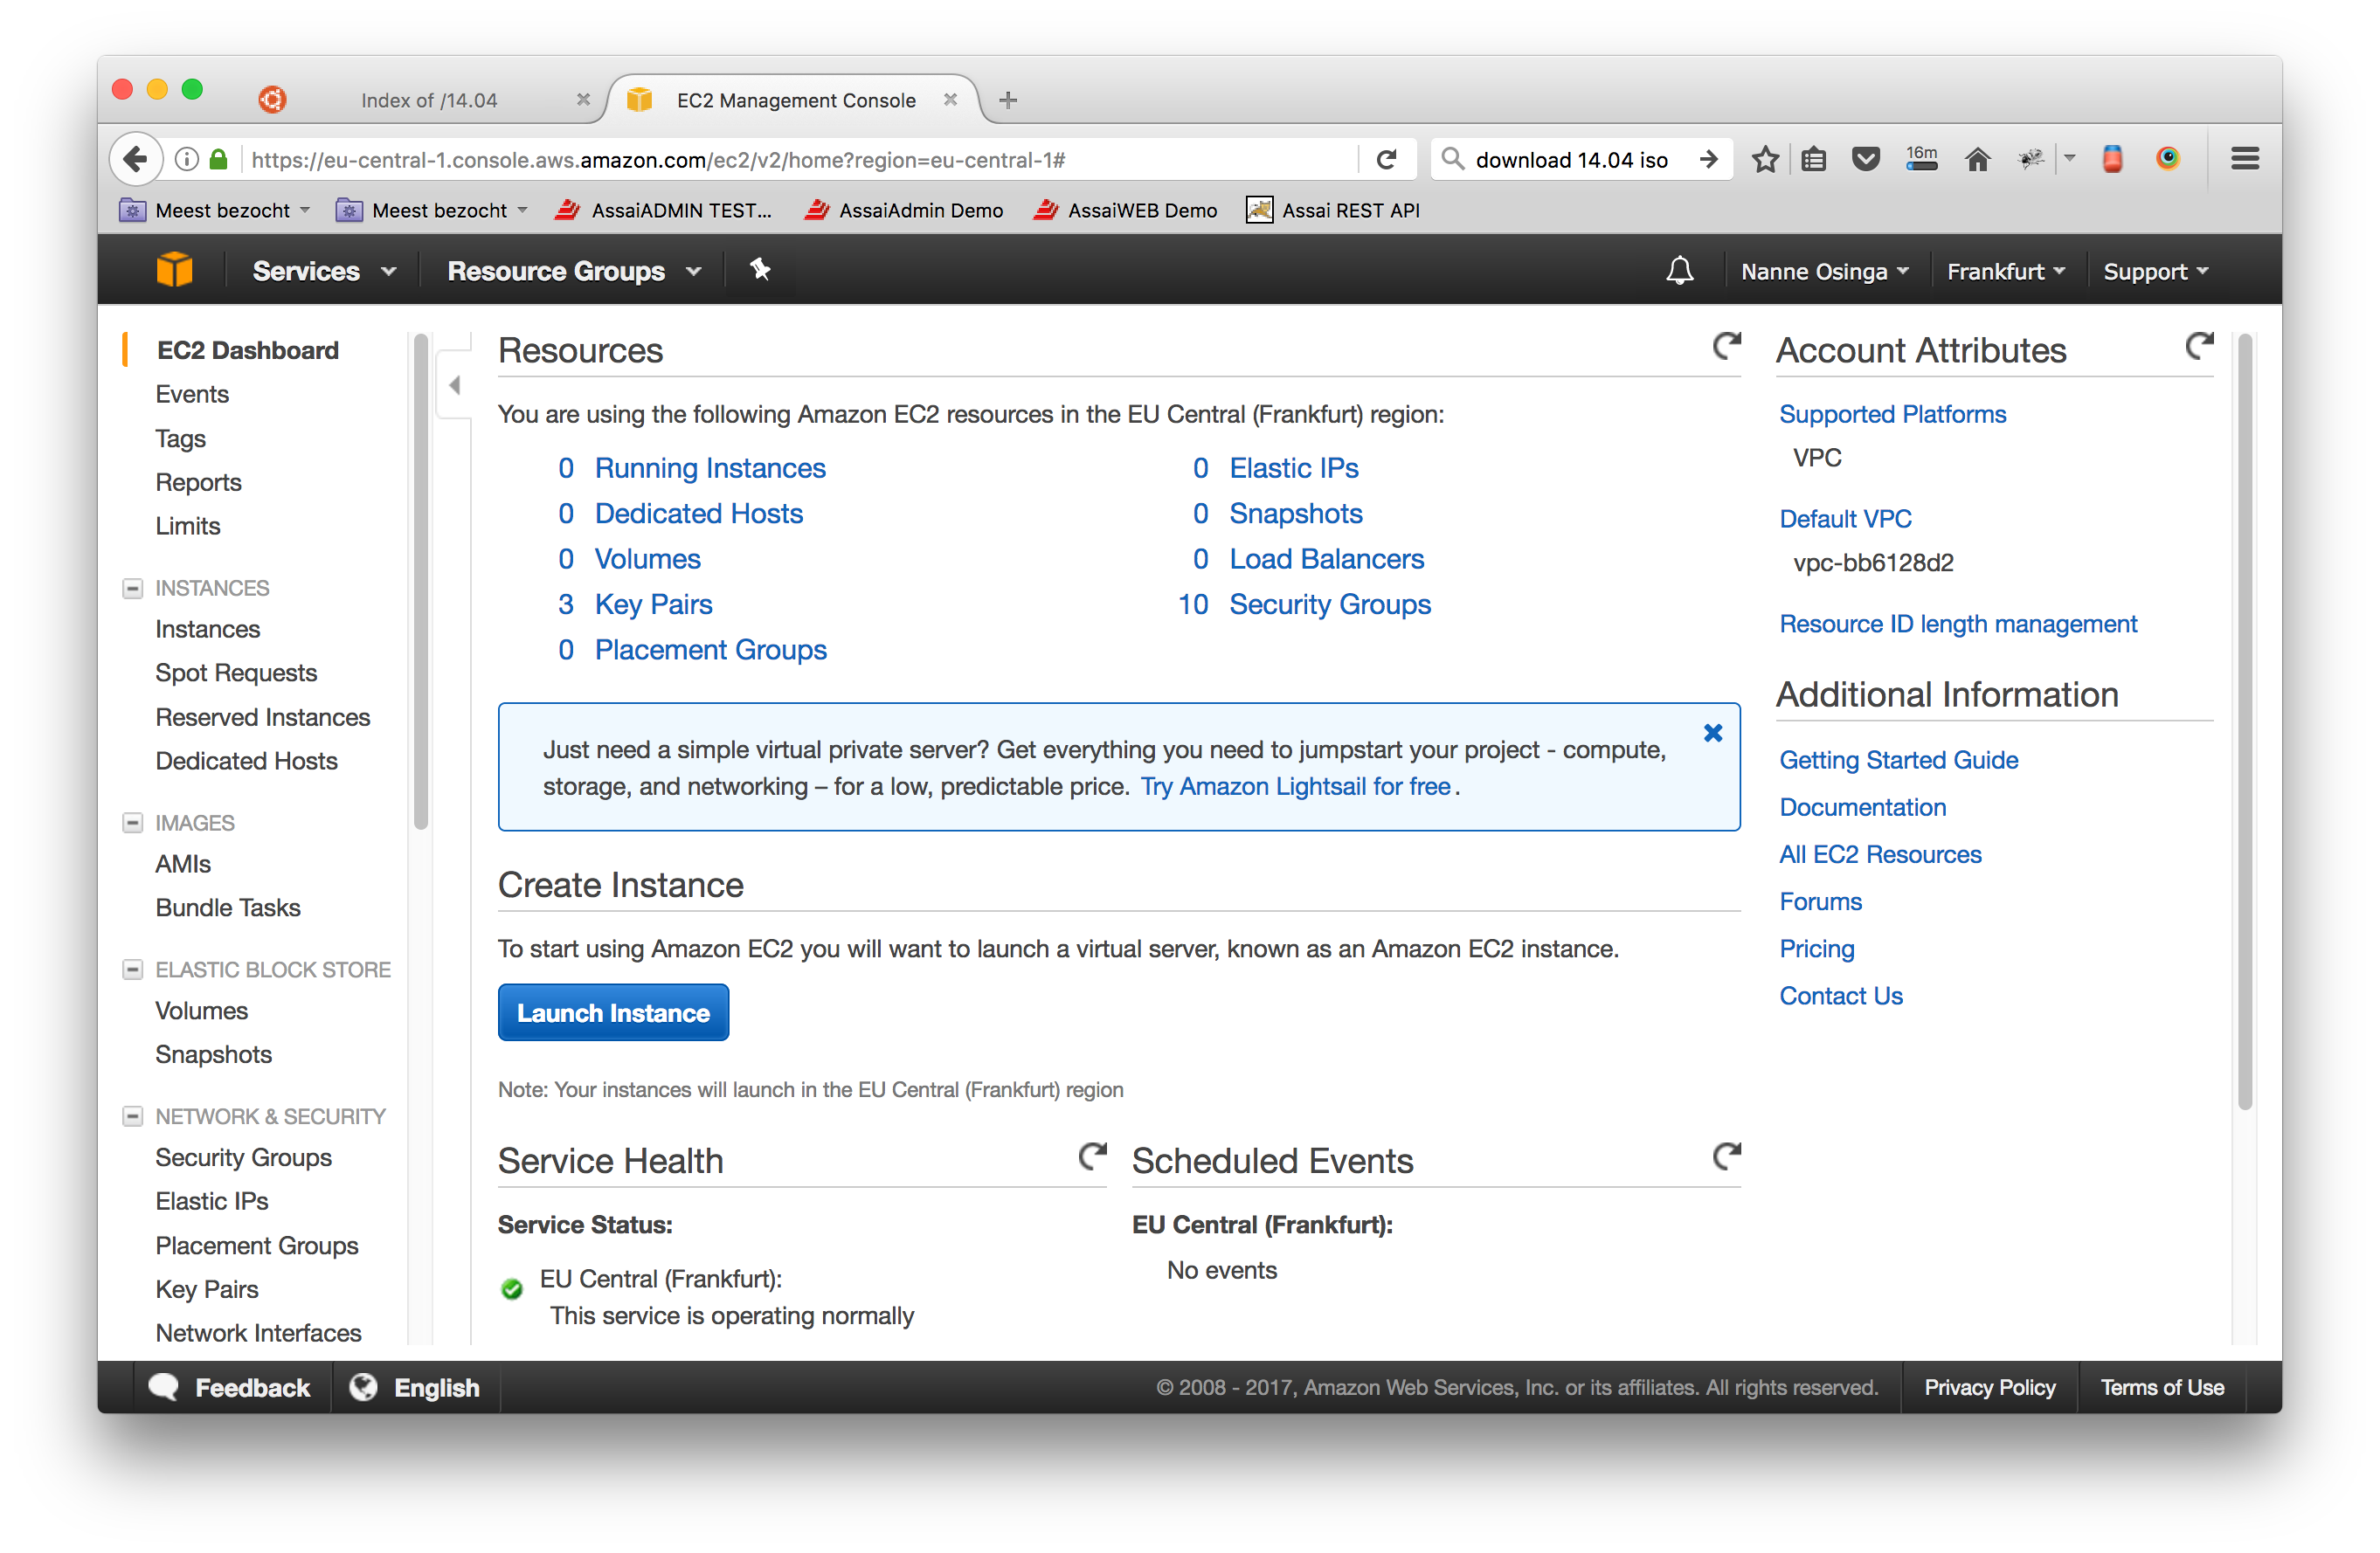
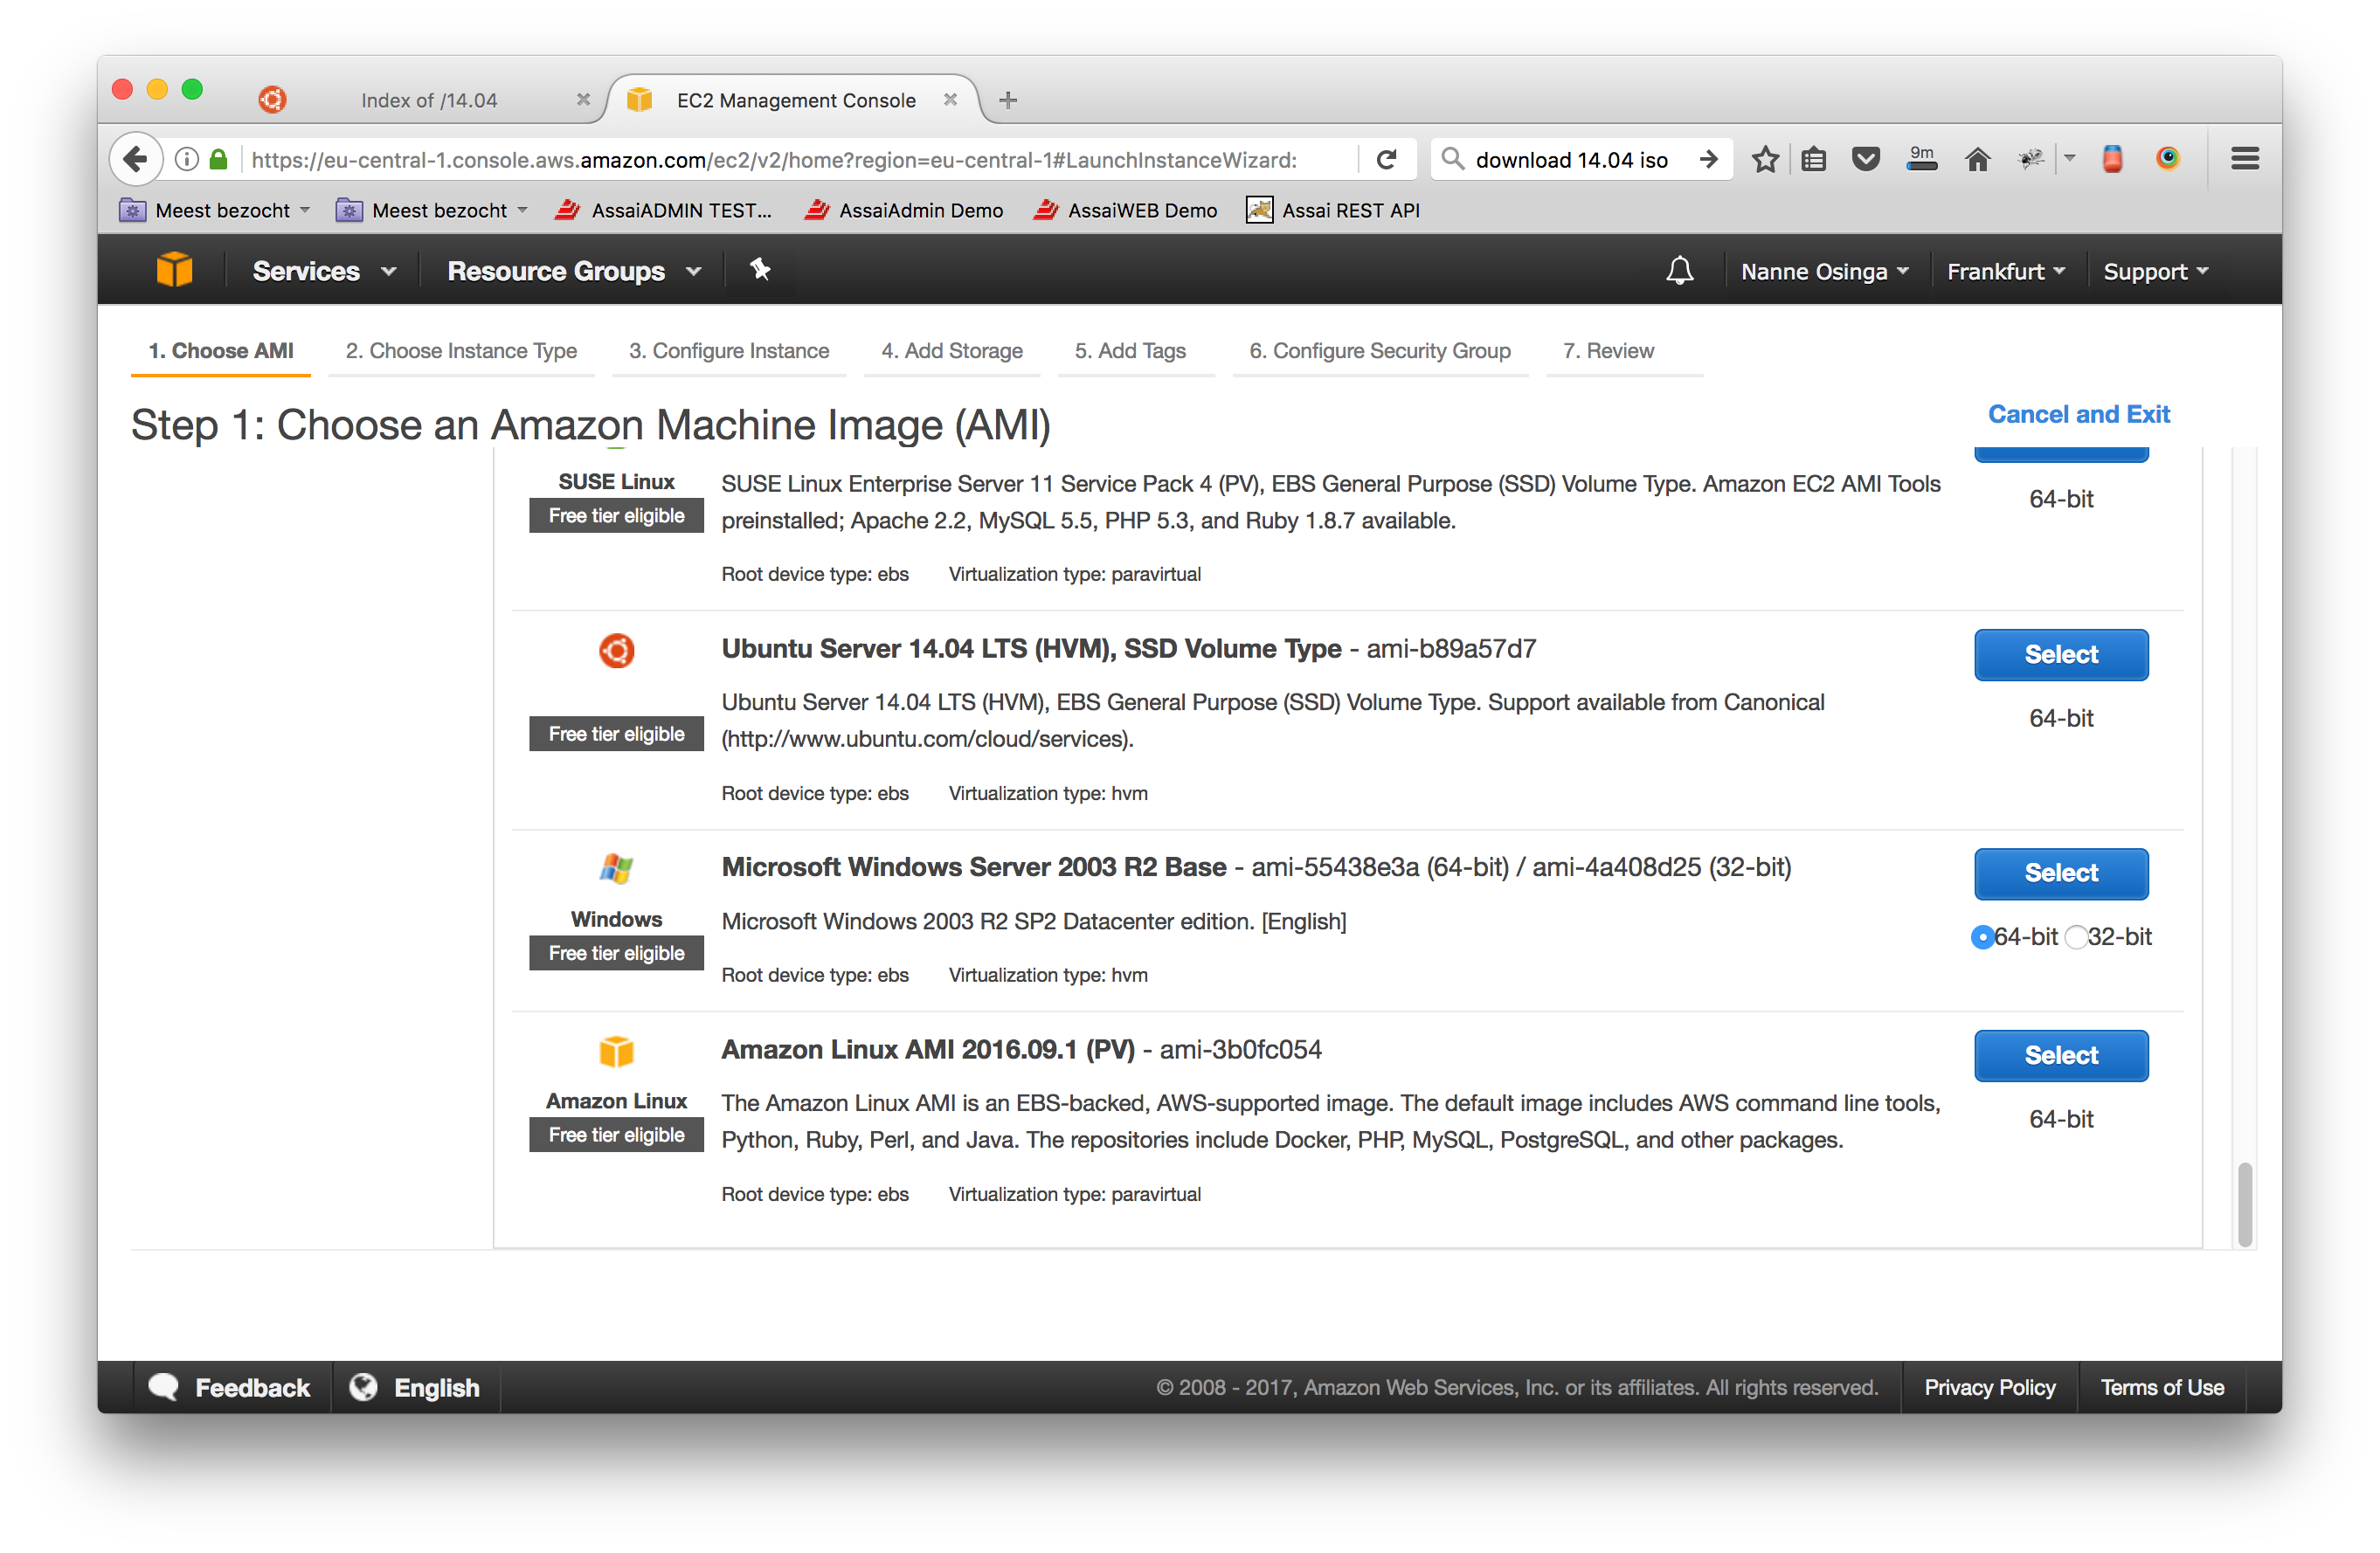
Step 1: Choose an Amazon Machine Image (AMI)
- Now you have to choose an Amazon Machine Image (AMI), scroll down to the bottom and choose
Ubuntu Server 14.04 LTS (HVM), SSD Volume Type - ami-b89a57d7
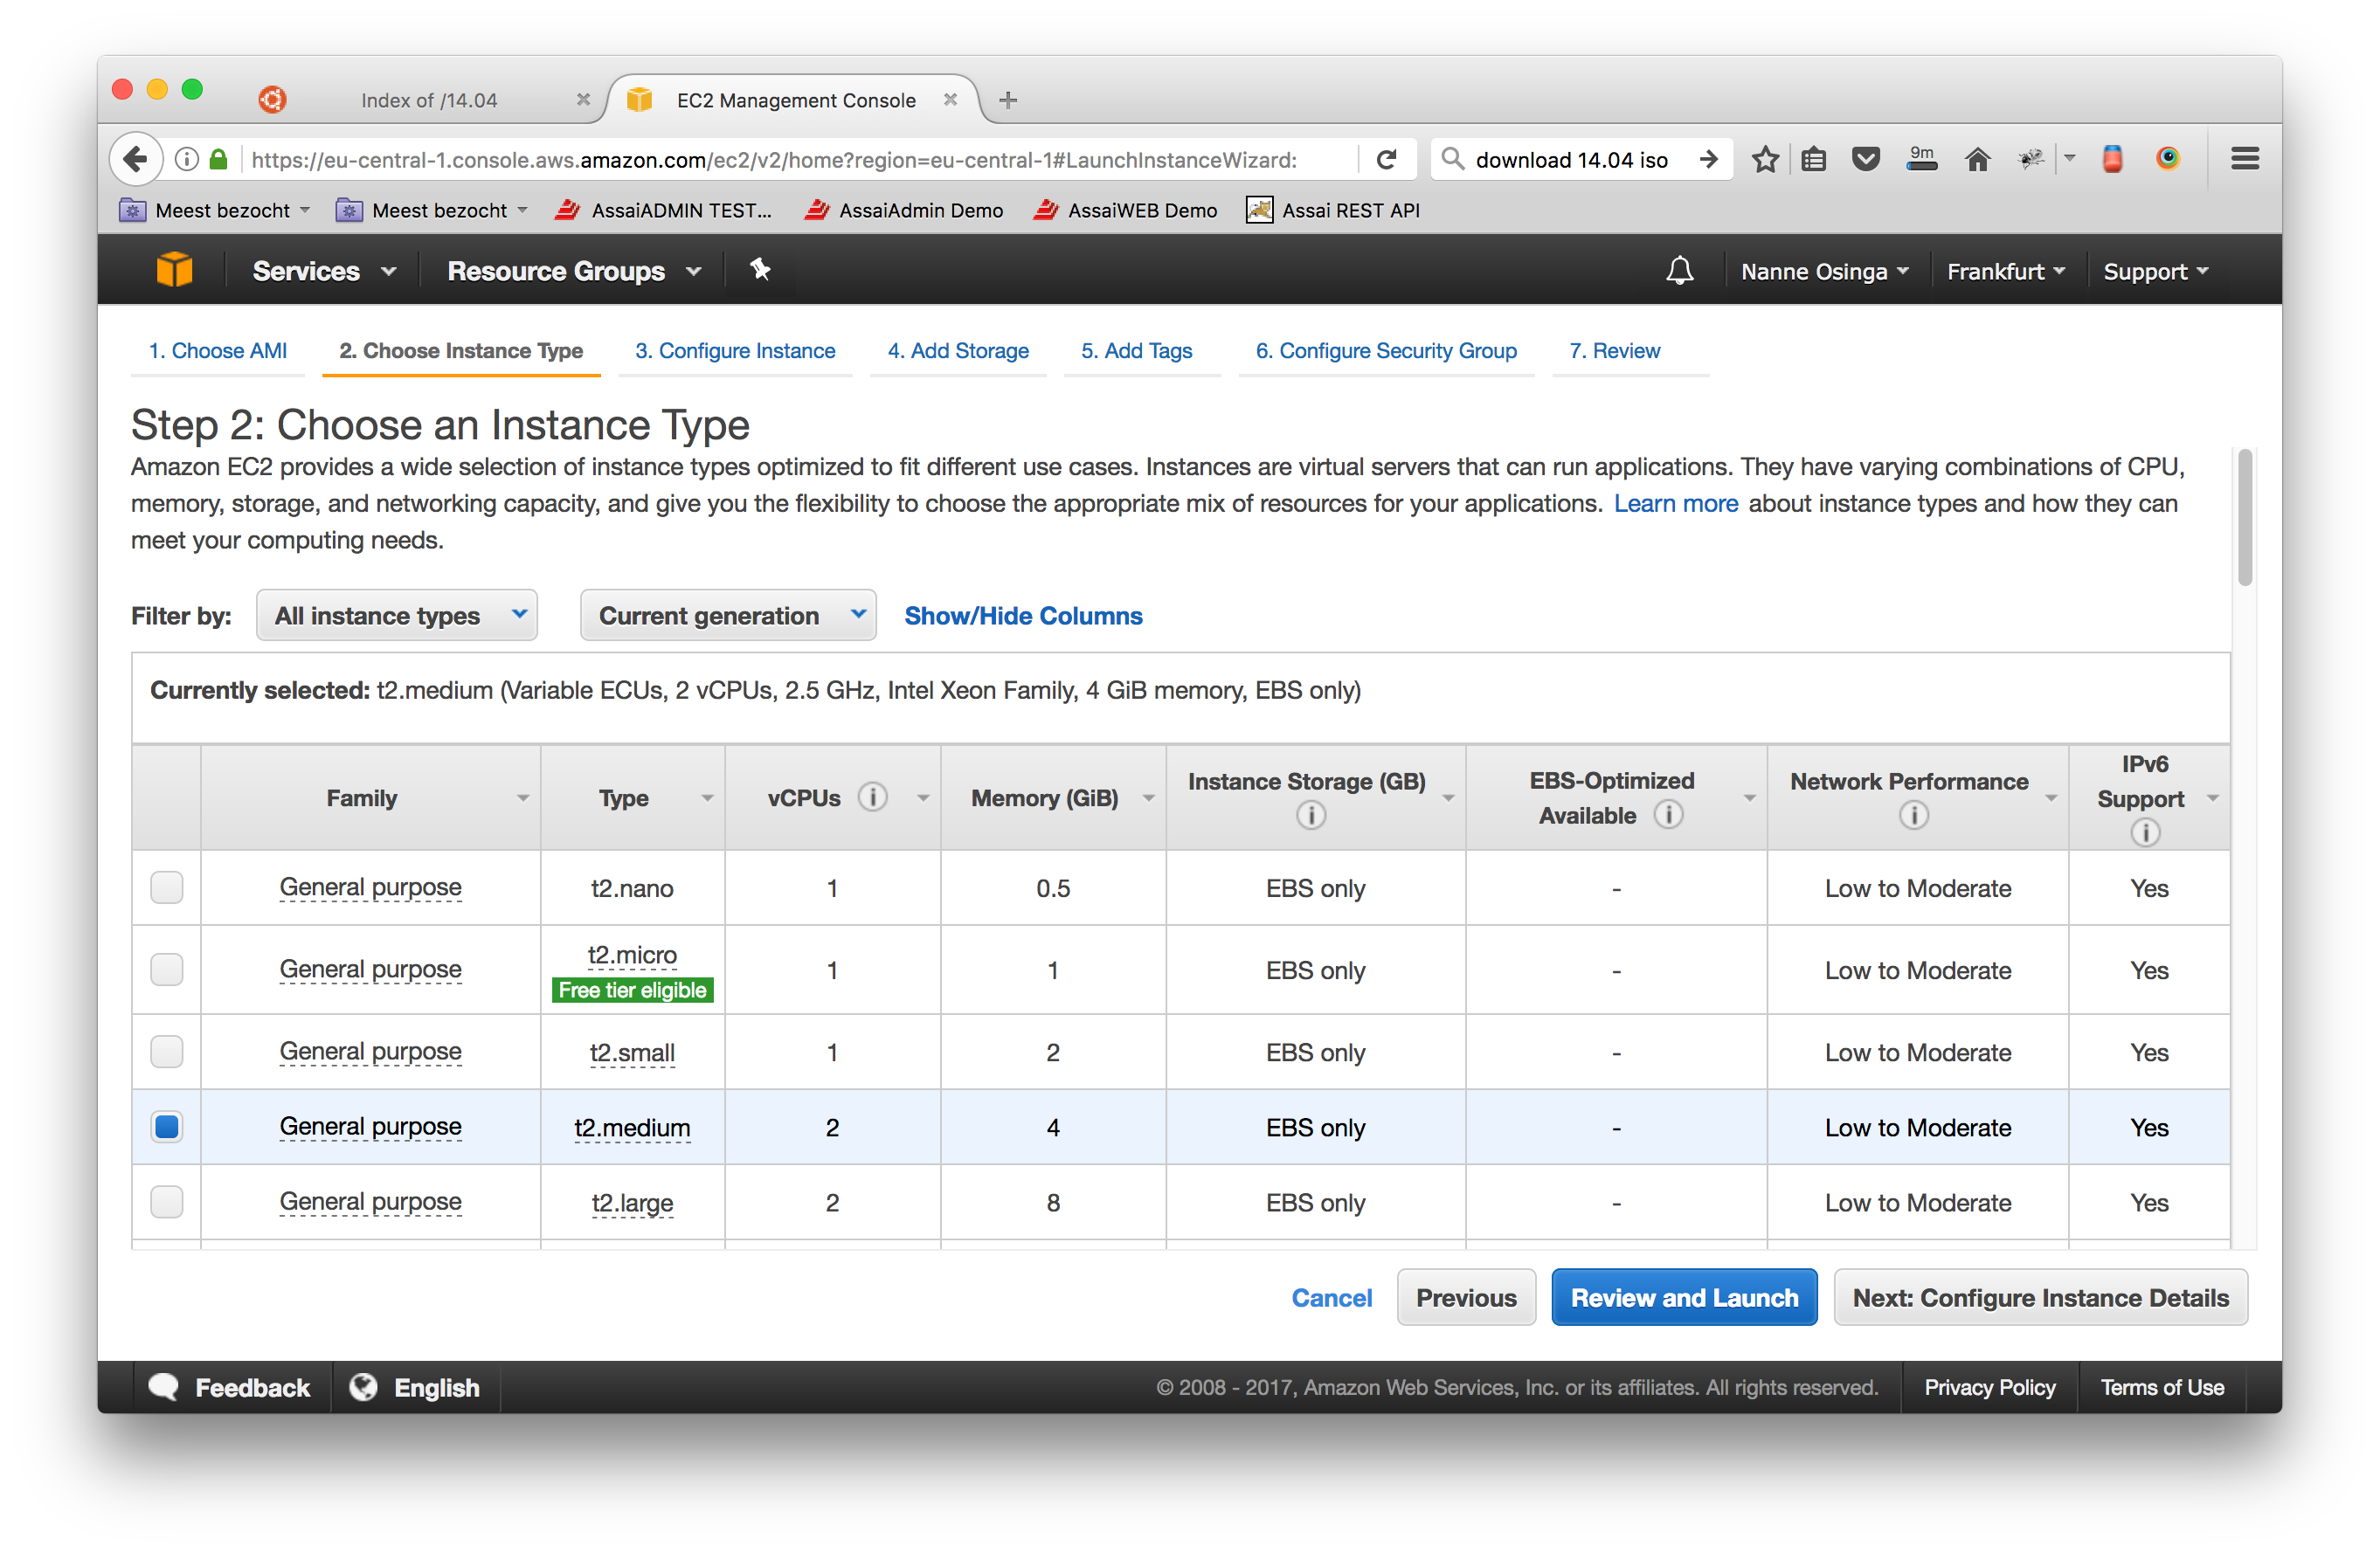
Step 2: Choose an Instance Type
- Choose t2.medium, this gives you a Memory of 4 GB
Step 3: Configure Instance Details
- In Step 3: Configure Instance Details, you can keep the defaults here
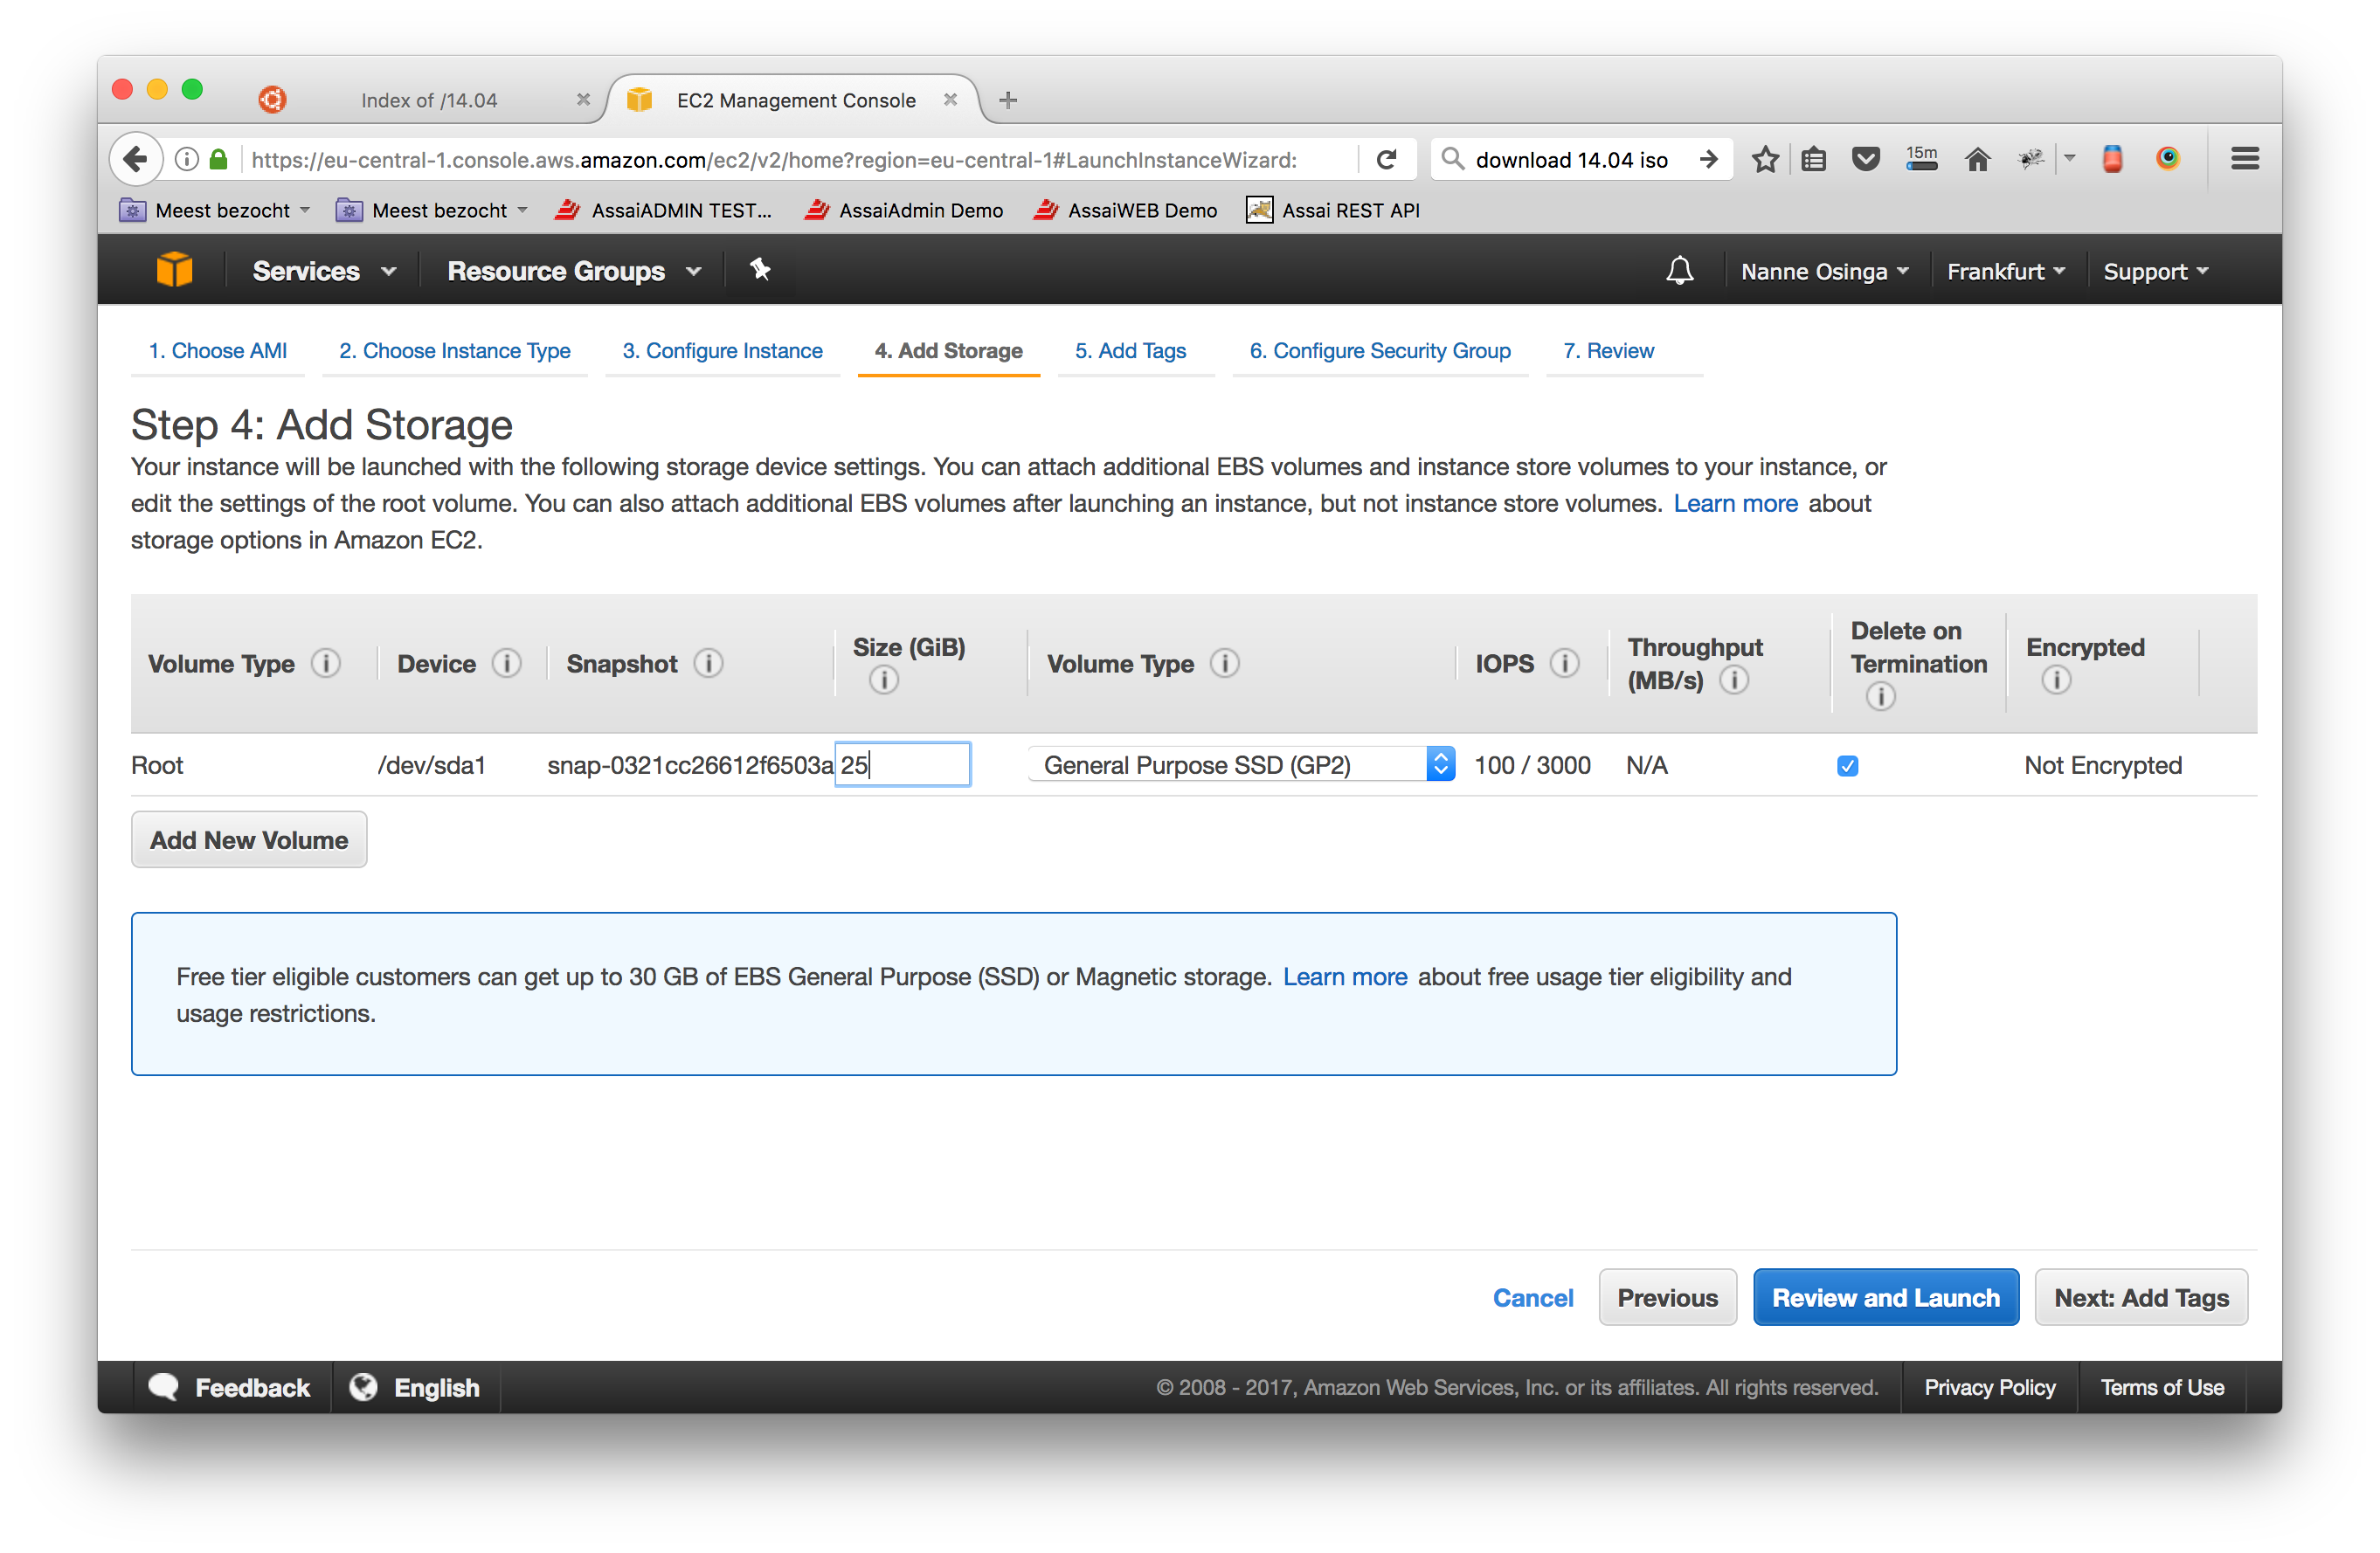
Step 4: Add Storage
- Chande the storage to 25 GB
Step 5: Add Tags
- Fill in
Name:vaizrdemobox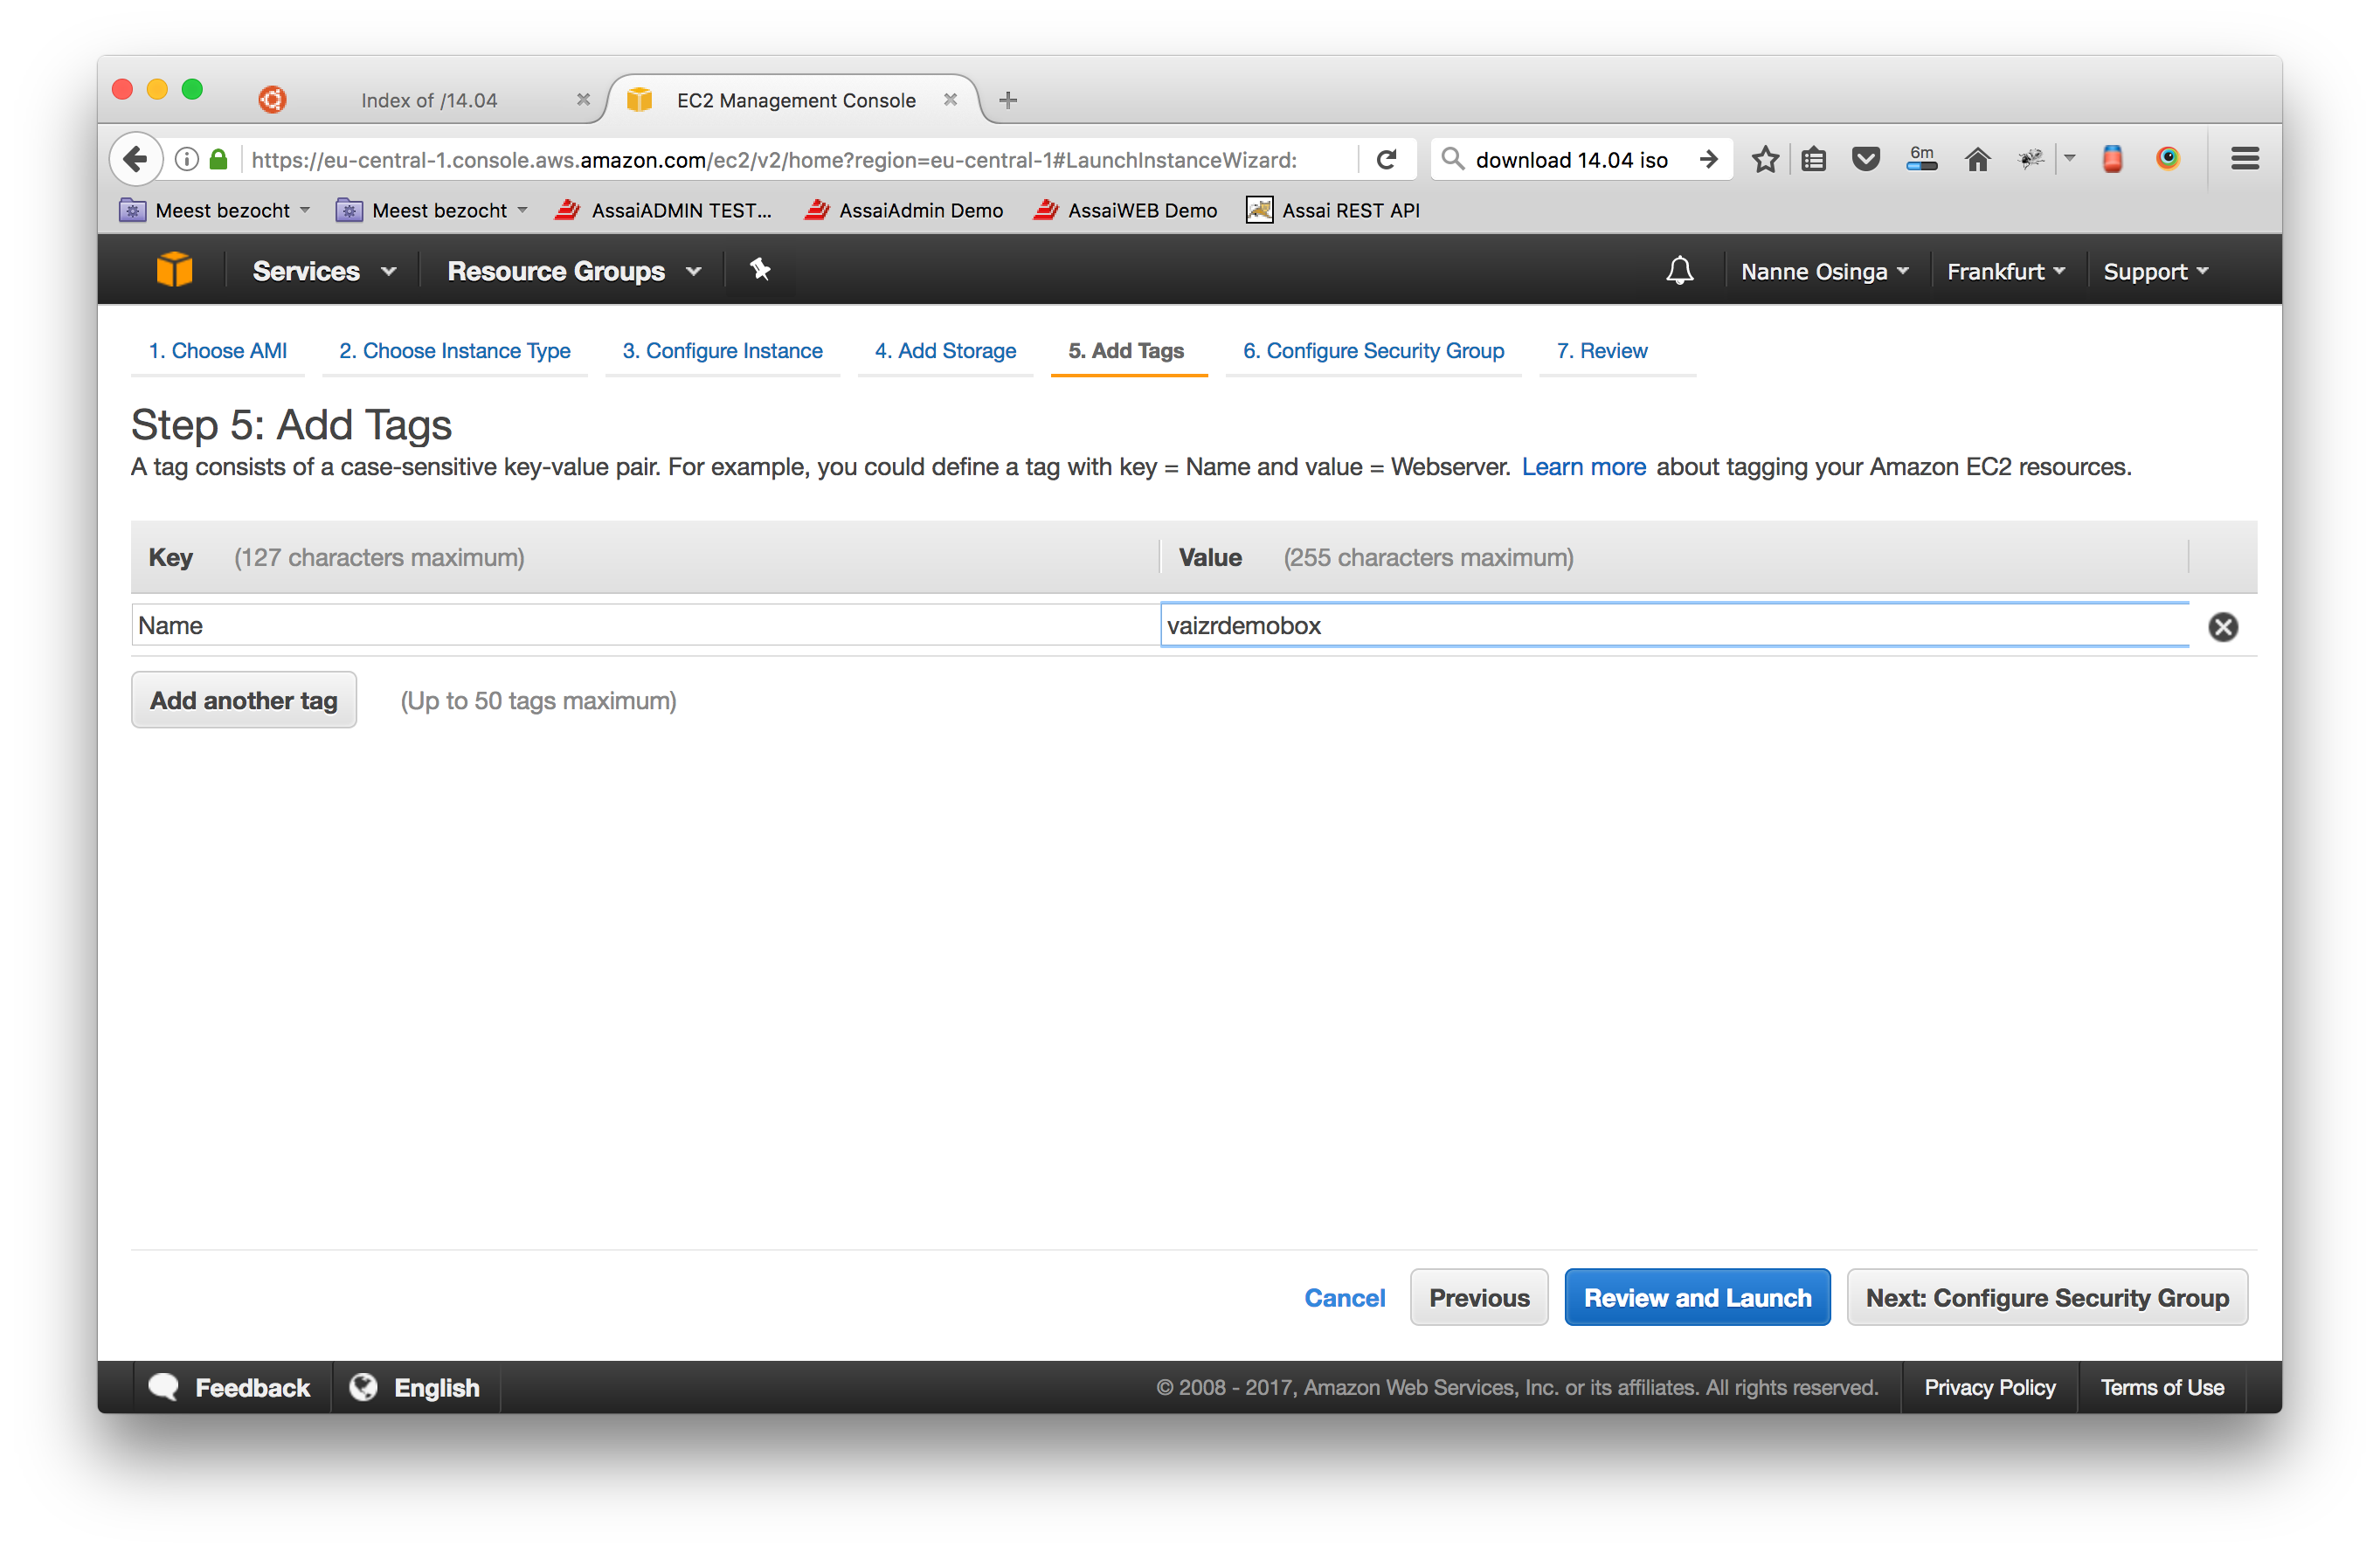
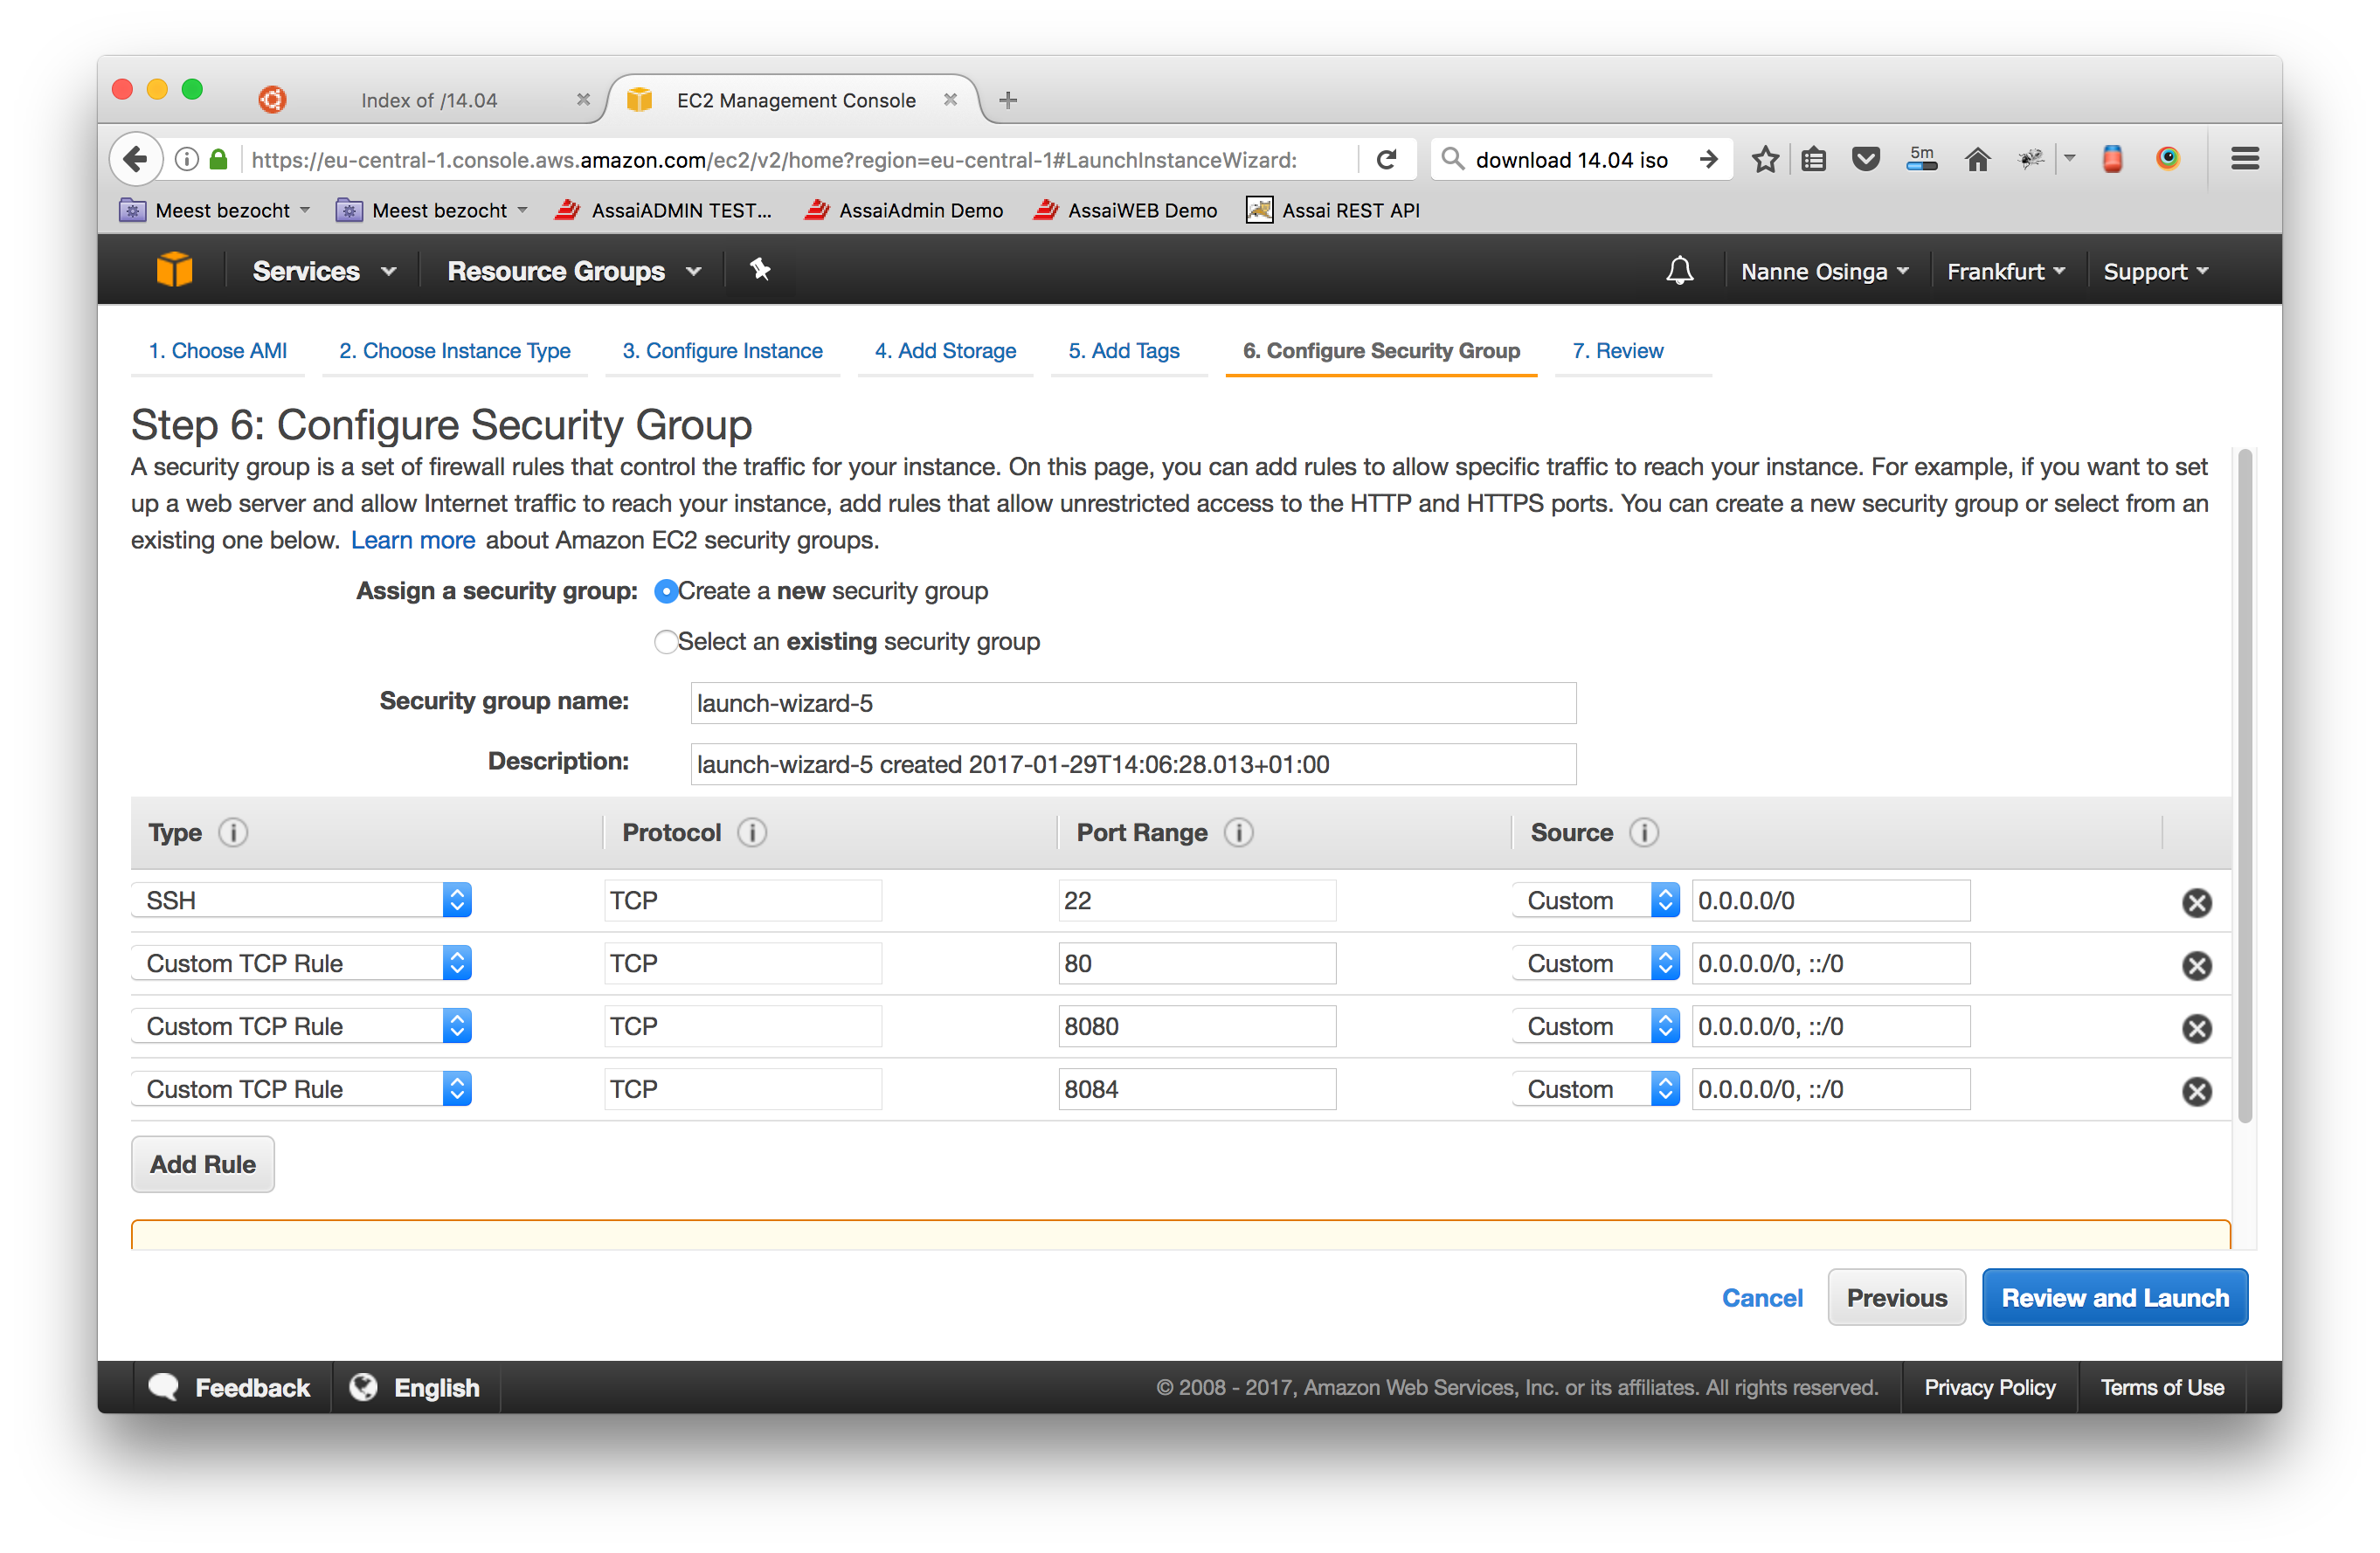
Step 6: Configure Security Group
- here we add four ports:
        * Port Range:22
        * Port Range:80
        * Port Range:8080
        * Port Range:8084
Step 7: Review Instance Launch
- Review instance.
- And click
Launch. - Now you get the following screen, choose an existing key pair or create a new one.
- After acknowledging
[v] I acknowledge ... -
You can click
Launch Instances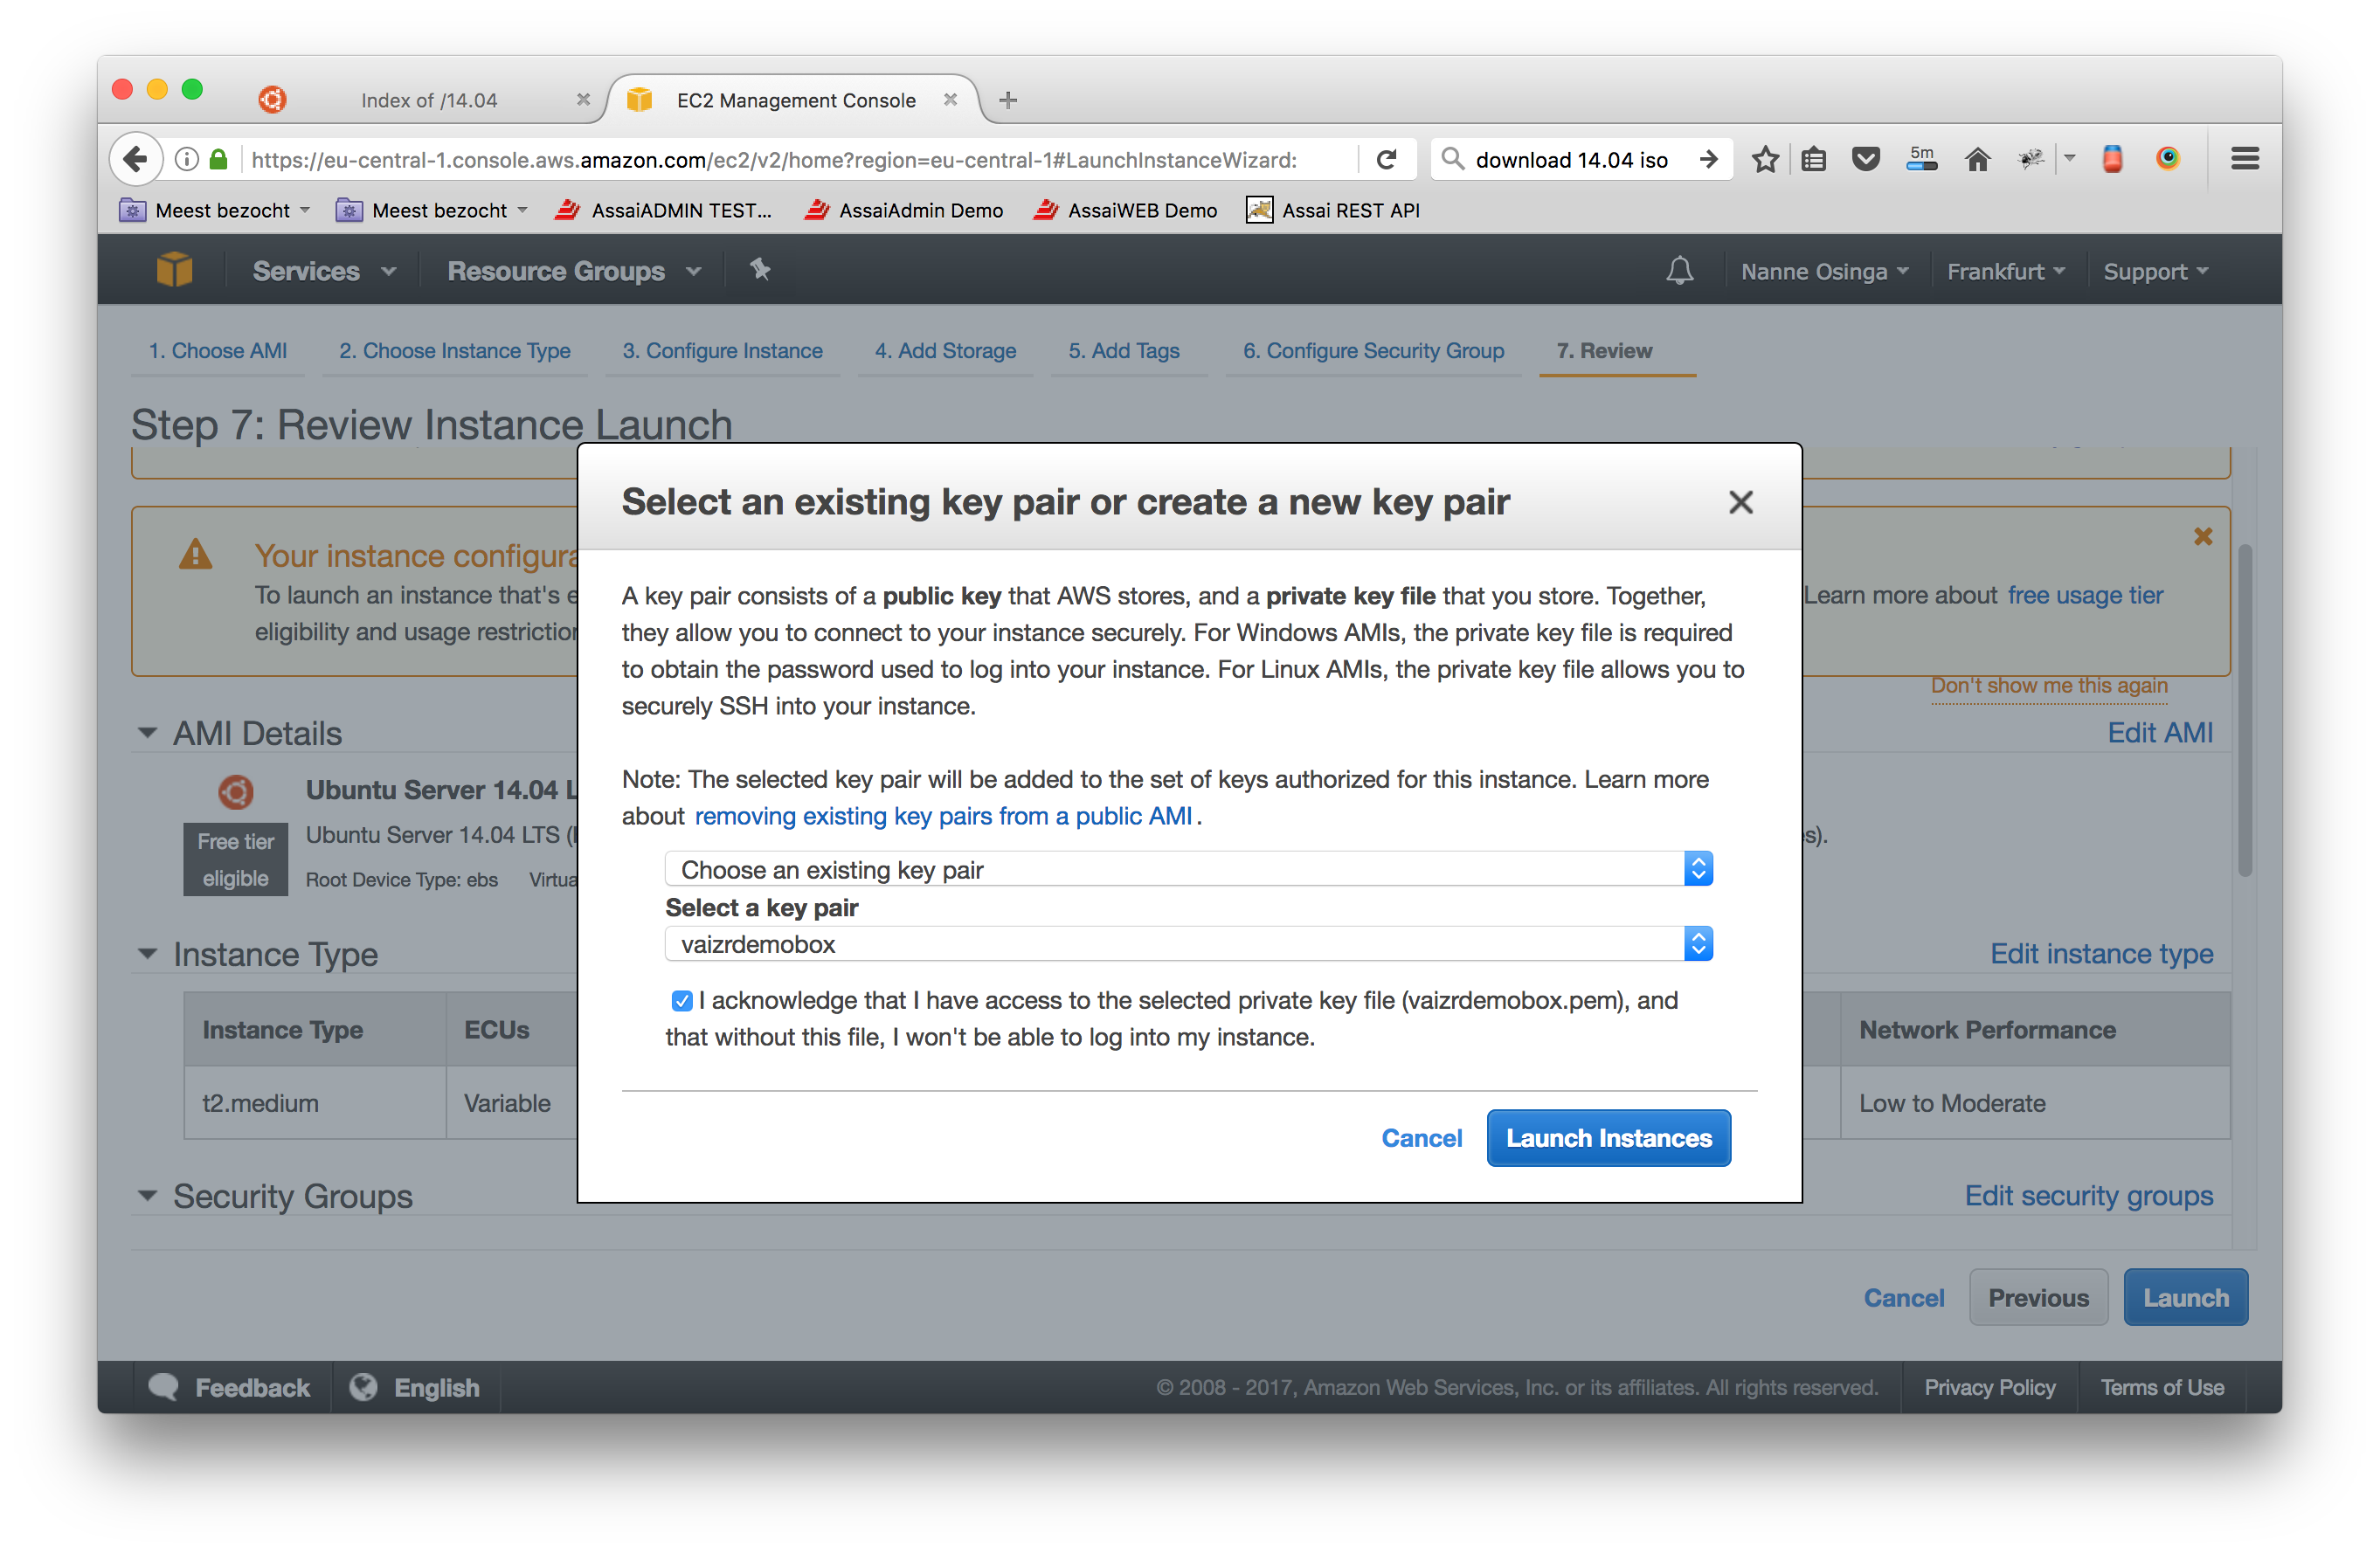
-
After launching you get the Lauch Status screen
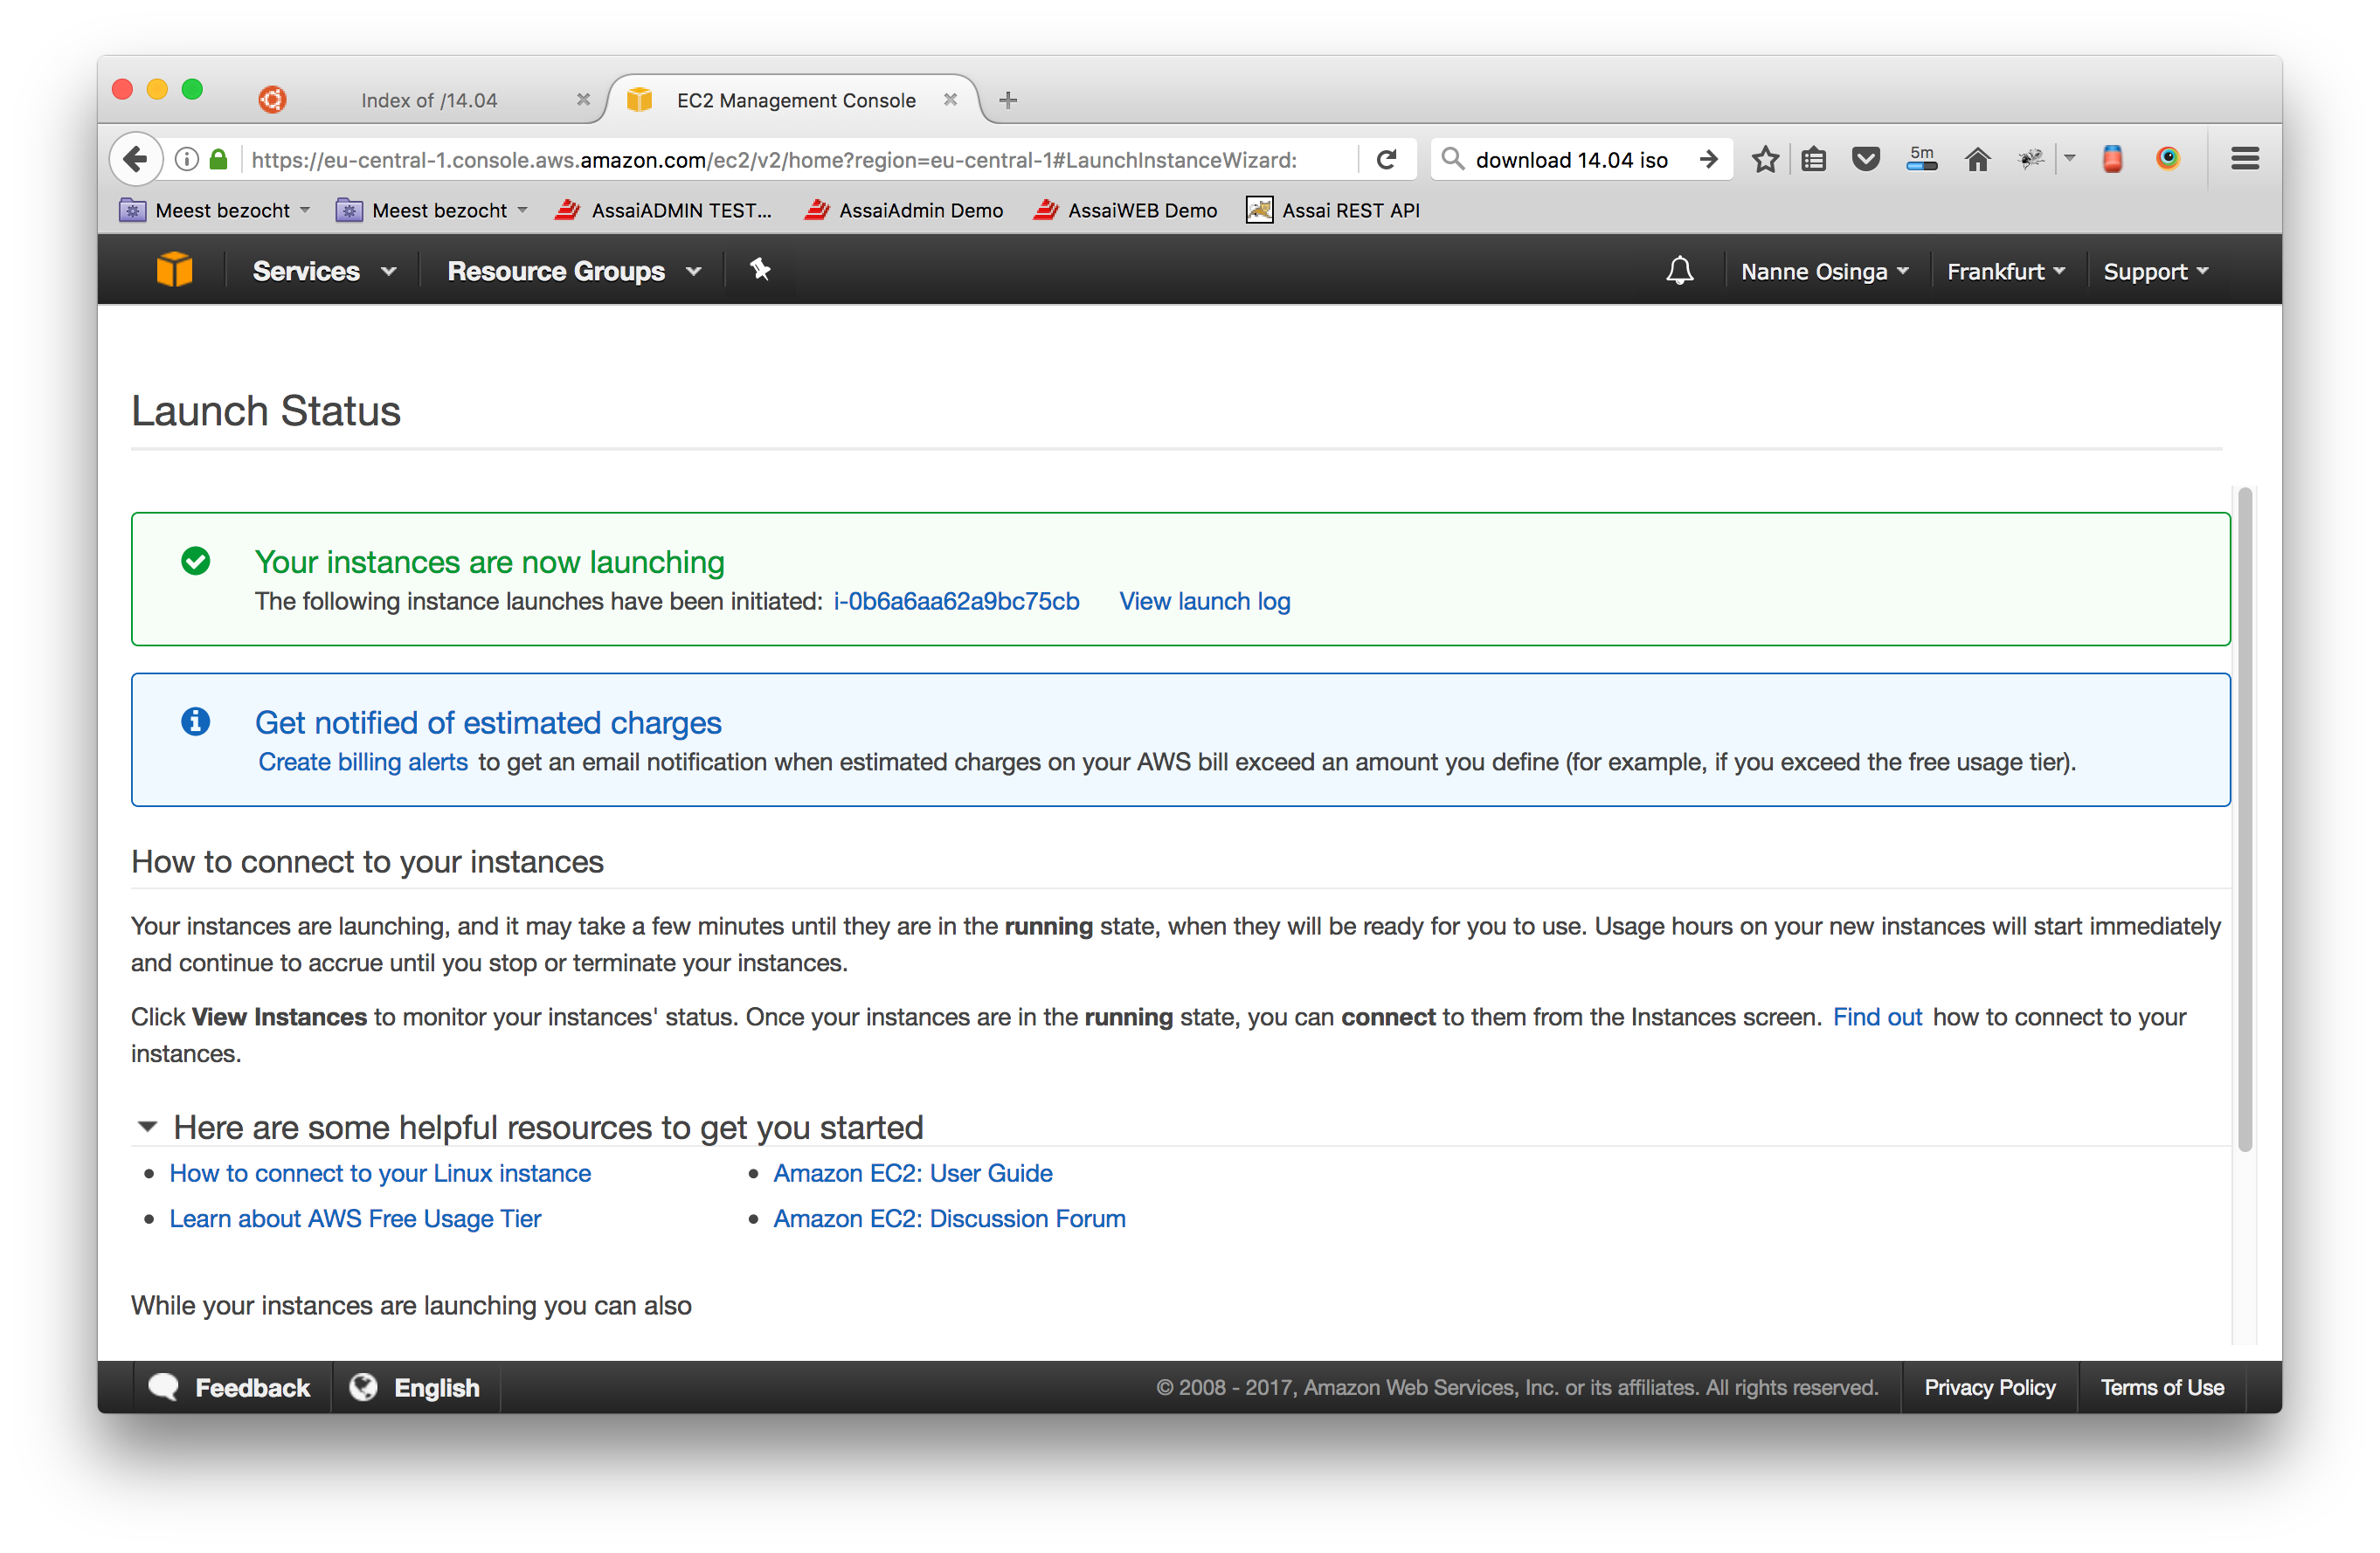
-
Clicking on the Instance ID gives you the Instance Overview
-
Wait till the Status Checks becomes green.
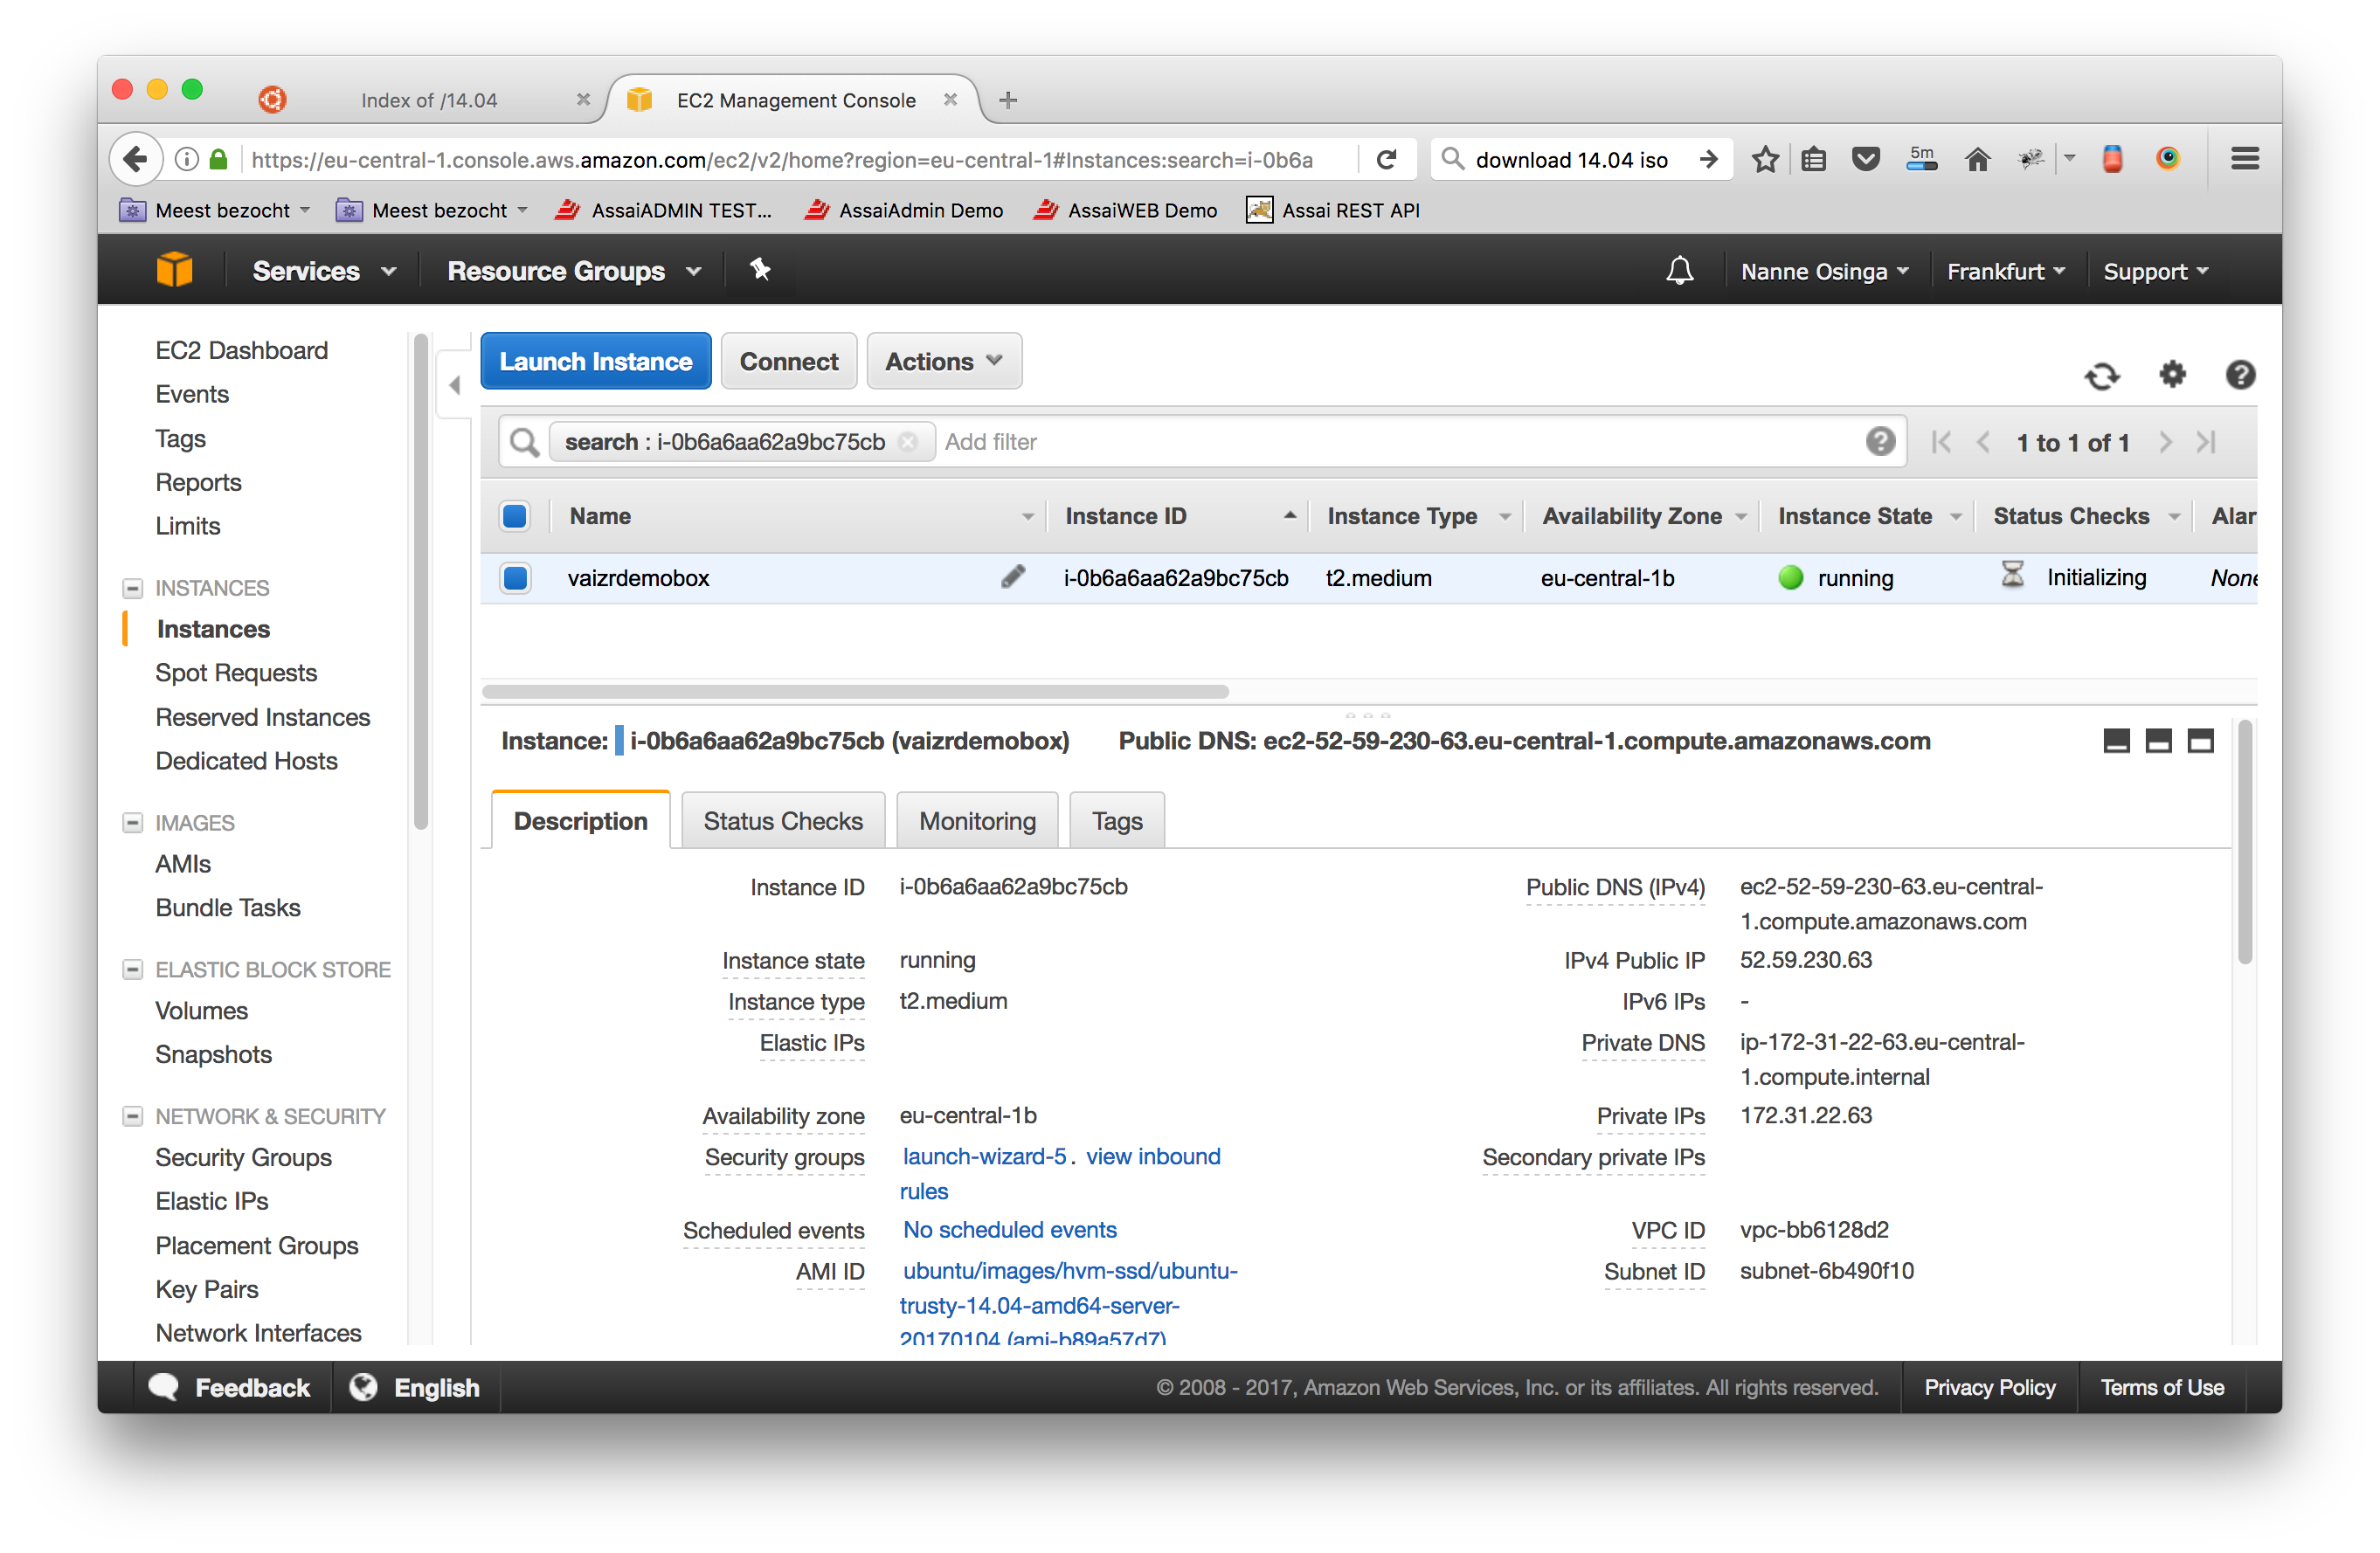
-
Now you can connect to your new created Instance
-
Click on the
connectbutton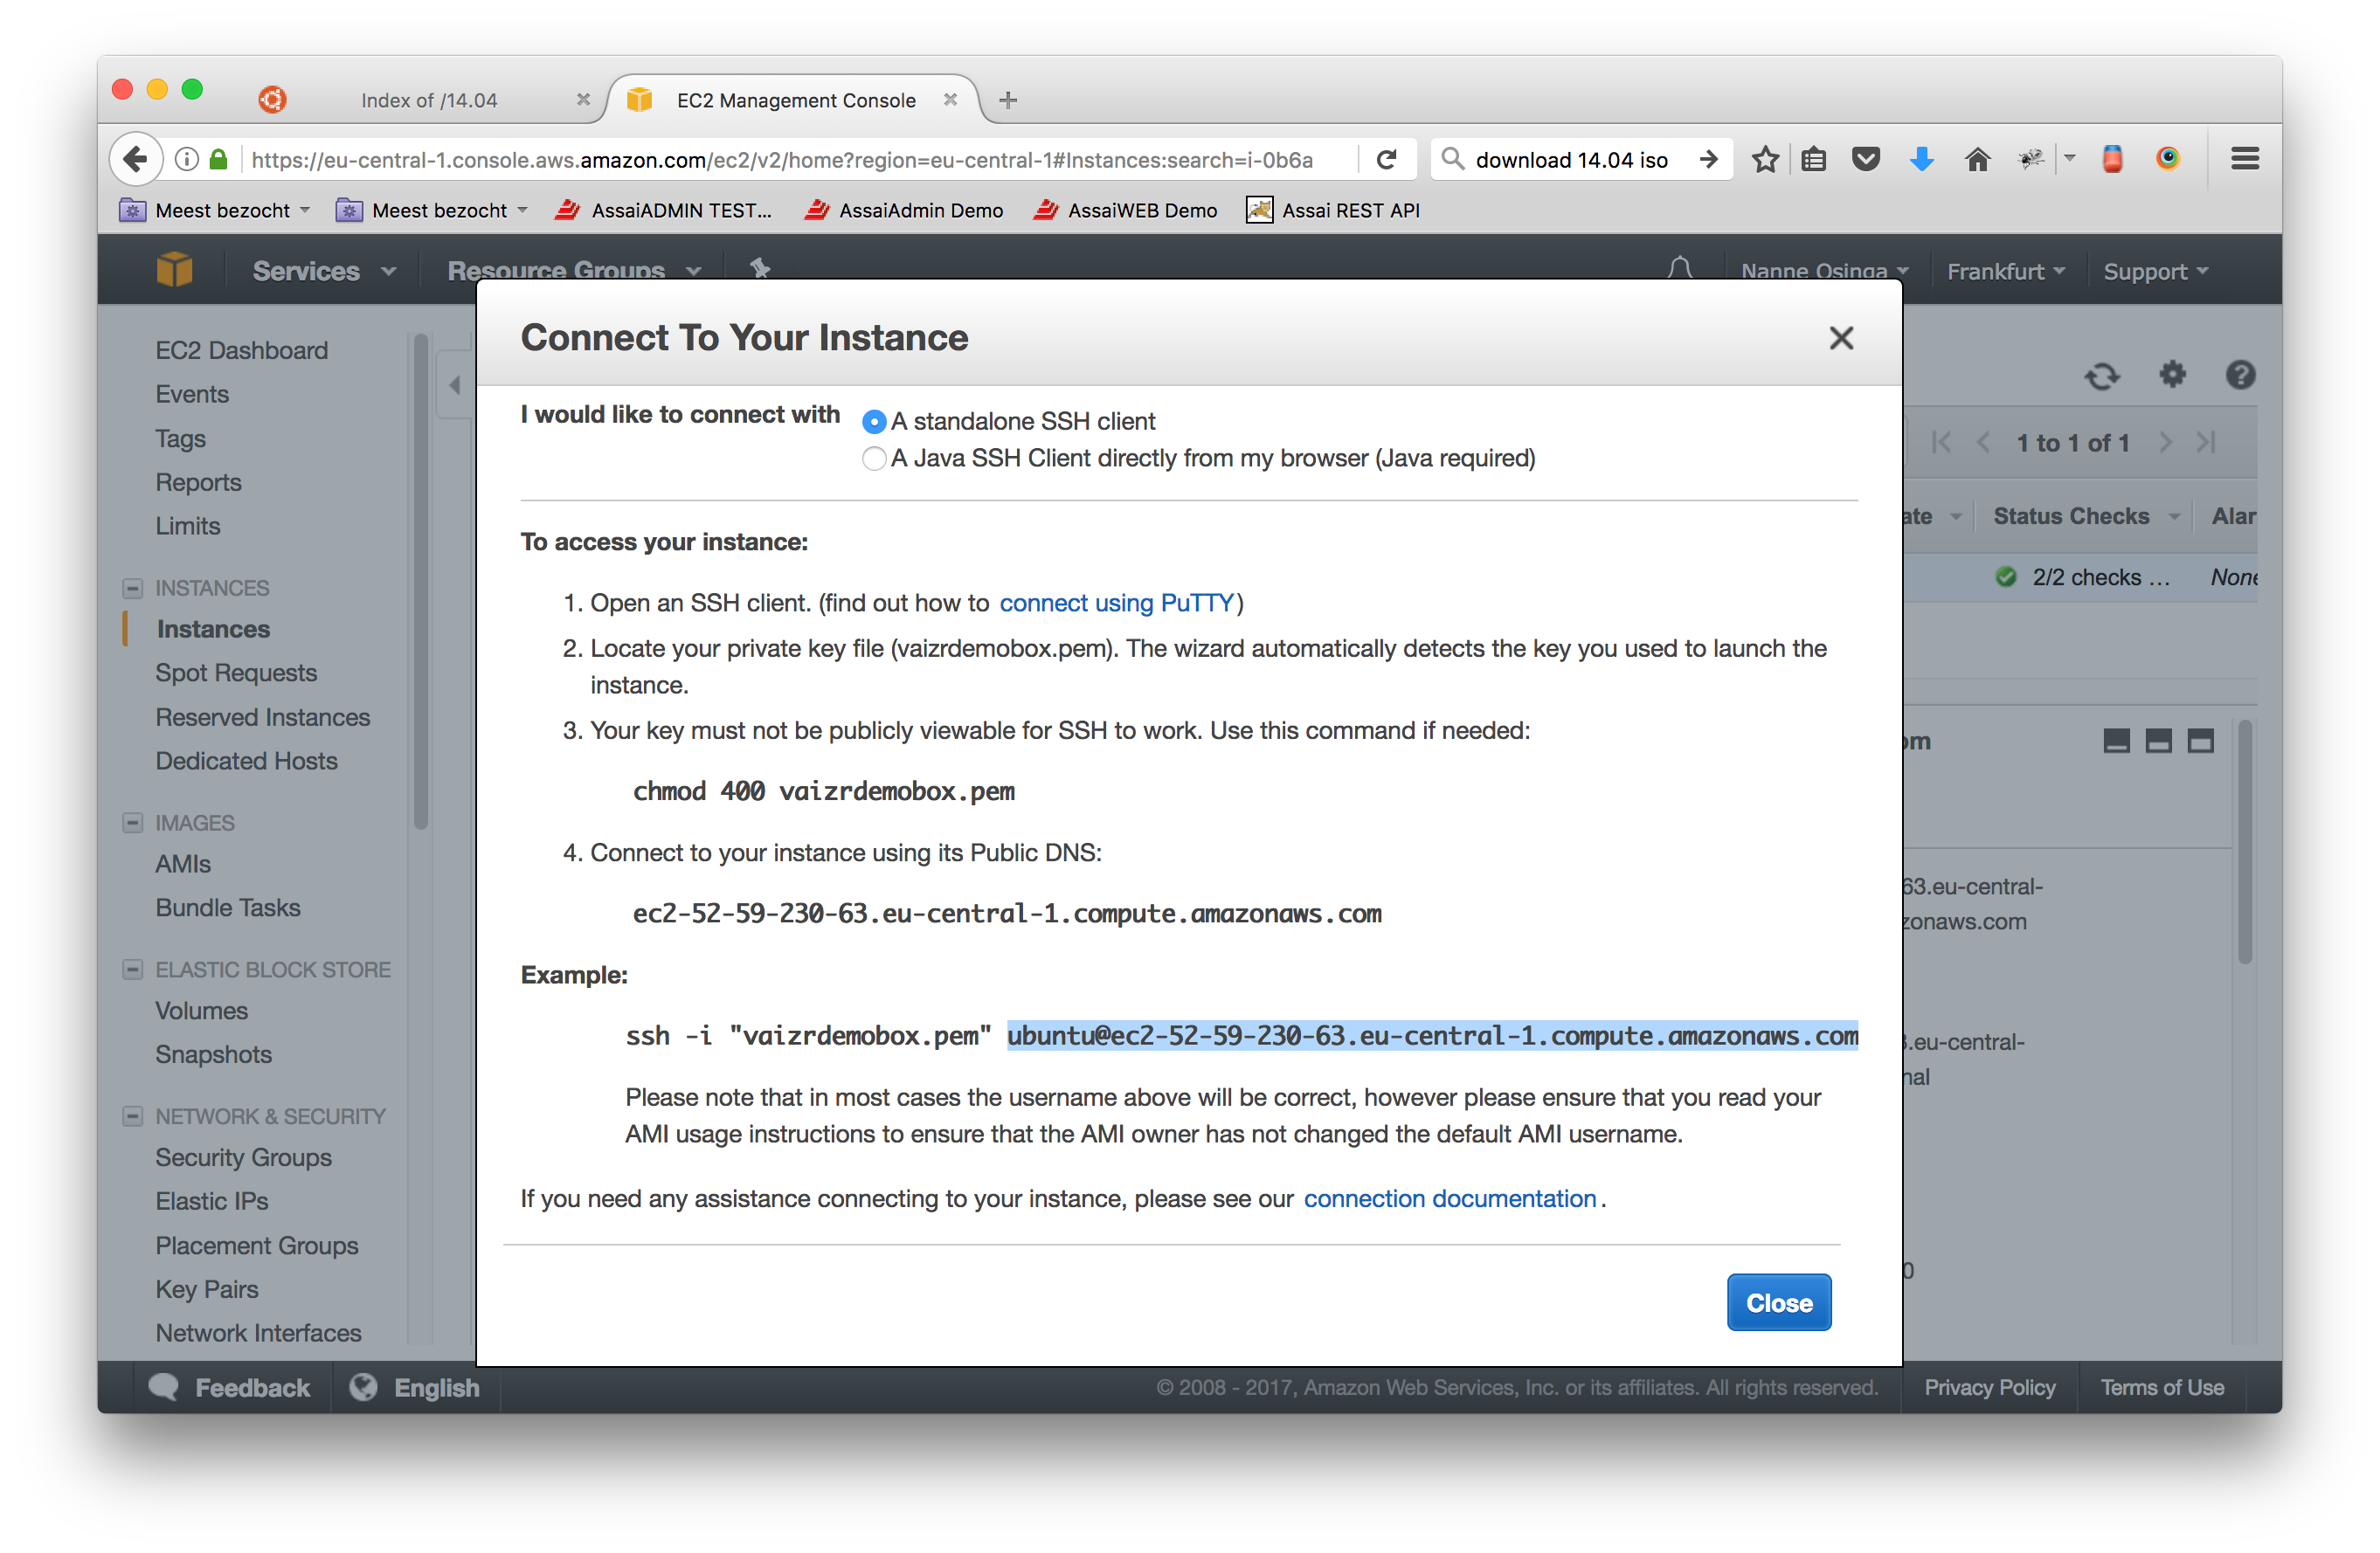
-
run as
ubuntuthelocalinstall_all.shscript on theAWS vaizrdemobox.
This script can be found in thevaizrdemohostscriptsunderinstall.
You can sftp the script to the vaizrdemobox or you can execute it directly with an ssh command.
If you have an ssh prompt you can run the following command:ssh -i "<aws-private-key>" ubuntu@<aws-address> < localinstall_all.shNannes-MacBook-Pro:install nosinga$ pwd /Users/nosinga/workspaces/vaizr/vaizrdemodeployment/install Nannes-MacBook-Pro:install nosinga$ ssh -i ./../cli/pem/awsvaizrdemobox.pem ubuntu@ec2-54-93-90-231.eu-central-1.compute.amazonaws.com < localinstall_all.sh Pseudo-terminal will not be allocated because stdin is not a terminal. Welcome to Ubuntu 14.04.5 LTS (GNU/Linux 3.13.0-106-generic x86_64) * Documentation: https://help.ubuntu.com/ System information as of Tue Jan 31 10:18:17 UTC 2017 System load: 0.0 Processes: 104 Usage of /: 3.2% of 24.47GB Users logged in: 0 Memory usage: 1% IP address for eth0: 172.31.23.250 Swap usage: 0% Graph this data and manage this system at: https://landscape.canonical.com/ Get cloud support with Ubuntu Advantage Cloud Guest: http://www.ubuntu.com/business/services/cloud 0 packages can be updated. 0 updates are security updates. New release '16.04.1 LTS' available. Run 'do-release-upgrade' to upgrade to it. Ign http://eu-central-1.ec2.archive.ubuntu.com trusty InRelease Get:1 http://eu-central-1.ec2.archive.ubuntu.com trusty-updates InRelease [65.9 kB] Get:2 http://eu-central-1.ec2.archive.ubuntu.com trusty-backports InRelease [65.9 kB] Hit http://eu-central-1.ec2.archive.ubuntu.com trusty Release.gpg Hit http://eu-central-1.ec2.archive.ubuntu.com trusty Release ... ... ... tmp/ansible-tmp-1485858212.1-267261430371833/source", "state": "file", "uid": 1000} PLAY RECAP ************************************************************************** 127.0.0.1 : ok=59 changed=53 unreachable=0 failed=0 Nannes-MacBook-Pro:install nosinga$
At this point we have created the start situation for Getting Started